Blog
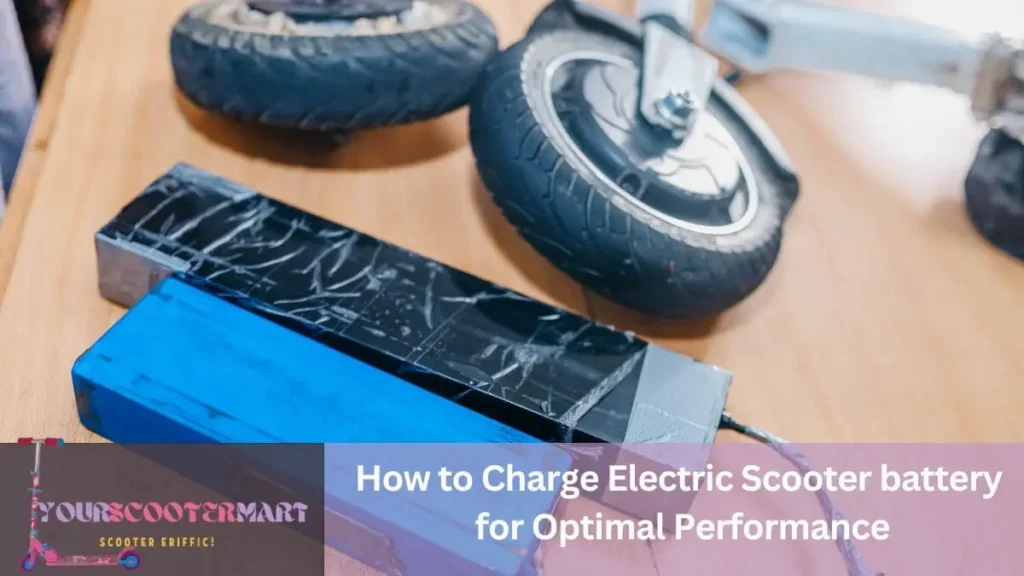
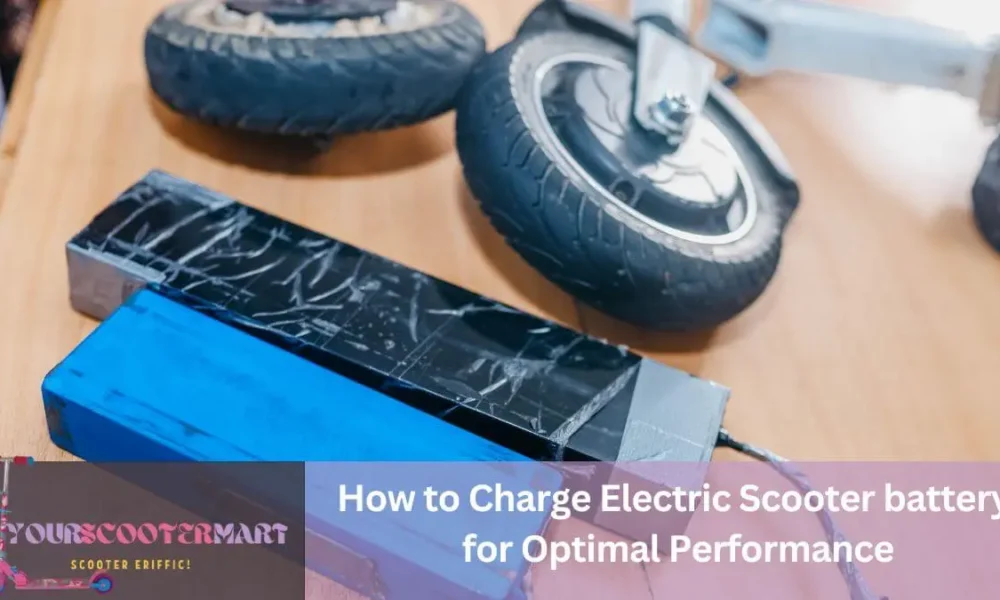
How to Charge Electric Scooter battery for Optimal Performance
Are you ready to get your electric scooter battery running at peak performance? Today I’m going to show you how to charge electric scooter battery the right way so that you can keep it running smoothly. So strap in, because we’re about to take a power-filled journey!
There is nothing more infuriating than running out of juice midway to your destination while using an electric scooter to get around town and enjoy the wind. Because of this, it’s crucial to understand how to charge your electric scooter battery properly. And I’m here to assist you with that!
You can learn everything you need to know about how to charge electric scooter batteries in this blog post. I have you covered for everything from the optimal charging procedures to advice on how to lengthen battery life. It’s time to plug in and get ready to go, whether you’re new to the world of electric scooters or just want to brush up on your charging techniques.
The Basics of Charging Your Electric Scooter Battery
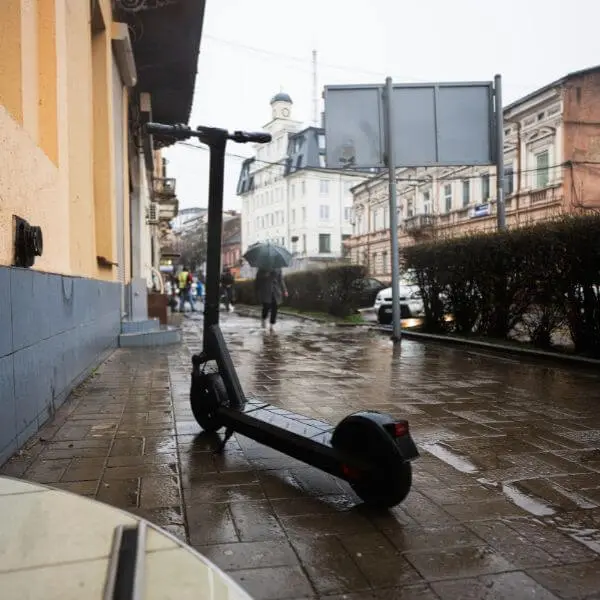
For optimal performance and safety, understanding how to charge electric scooter battery is essential. Before attempting to charge your scooter’s battery, refer to its manual for instructions on how to do so. The charging process can be complicated if you don’t know what you’re doing, so it’s important to understand the basics.
When charging a battery, always use the recommended charger and ensure it’s compatible with your scooter’s make and model. How long it takes to fully charge a battery depends on the size of your scooter’s battery and the capacity of the charger being used. Generally, most batteries take approximately 6-8 hours to reach full charge; however, this time may vary depending on its current capacity when plugged in. Before powering up, double-check that both the scooter’s charging port and charger are secured in place properly and that you set all switches in their off positions. Also check the battery level.
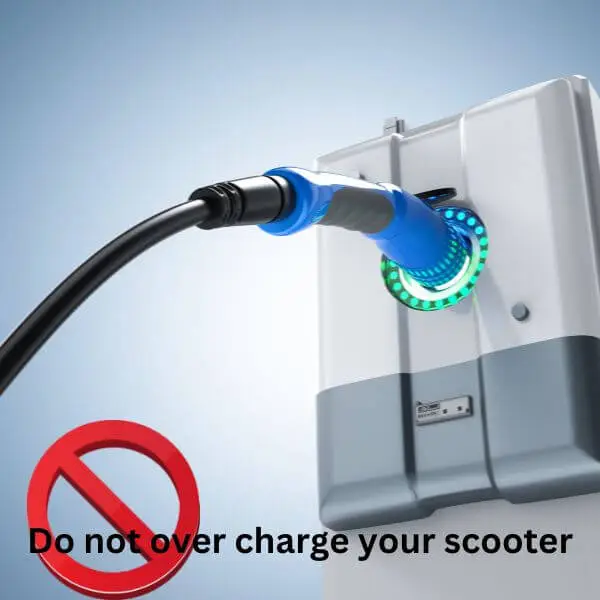
To reduce any risk of overcharging or damaging your electric scooter battery, be sure not to leave it plugged in beyond 8-10 hours to charge or you might risk damaging it. Charging too often will also reduce its lifespan each time, so try to minimize charging when not necessary. When you’re ready for another ride with a fully charged e-scooter, remember these tips for optimum performance and safety when trying to extend its lifespan by charging and discharging it in a timely manner!
Always wear a protective gear while riding an e-scooter.
The Importance of Using the Correct Charger for Your Electric Scooter
It is essential to use the correct charger for your electric scooter when it comes to proper battery maintenance. Overcharging or undercharging your scooter’s battery is not recommended as both will cause long-term damage to the battery’s performance. Manufacturers of electric scooters usually provide specific details on how often you should charge their product.
It is important to take into consideration that different types of electric scooters, such as those used on green space terrain and off-road, require different charging requirements than those used for commuting. For example, green space terrain scooters typically require a higher State-Of-Charge (SOC) when compared to a regular commuting scooter.
The internet is an excellent source if you want more information about charging an electric scooter’s battery safely. You can also find services online where trained technicians can inspect and replace/upgrade your existing charger with a better option if necessary.
When it is time to charge your electric scooter, remember that using the correct charger for your particular model and type provides optimal performance in terms of range, axle life, and other factors relating to the balance of power output from the motor or the ability sustaining a top speed without draining all energy too quickly.
If you need scooter for tricks you can read “The 21 Best Pro Scooters of 2023“.
Understanding the Different Types of Electric Scooter Batteries and Their Charging Requirements
Charging your electric scooter’s battery is essential for optimal performance. It is important to understand the various types of batteries used in electric scooters and their charging requirements. Common categories include lithium-ion, lead-acid, and nickel-cadmium batteries. Each type has advantages and disadvantages that are important to understand when selecting a battery for your electric scooter.
1. Lithium-ion batteries
Lithium-ion batteries are most commonly found in electric scooters and provide the most efficient performance with long battery life due to their high energy density. They typically require an external charger or DC power adapter, as we should not overcharge these batteries like other types of batteries.

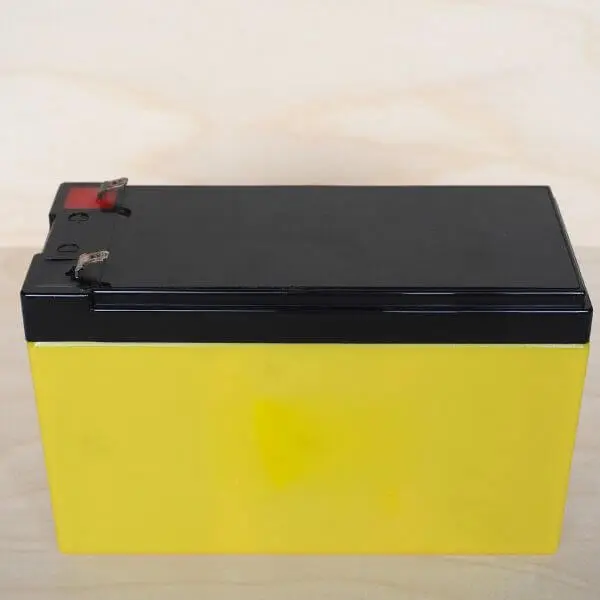
2. Lead-acid batteries
Lead-acid batteries are heavier than lithium-ion but offer lower costs with a much lower charge time required compared to lithium-ion cells. They tend to have fewer recharge cycles before needing replacement, though they still perform efficiently overall when cared for properly.
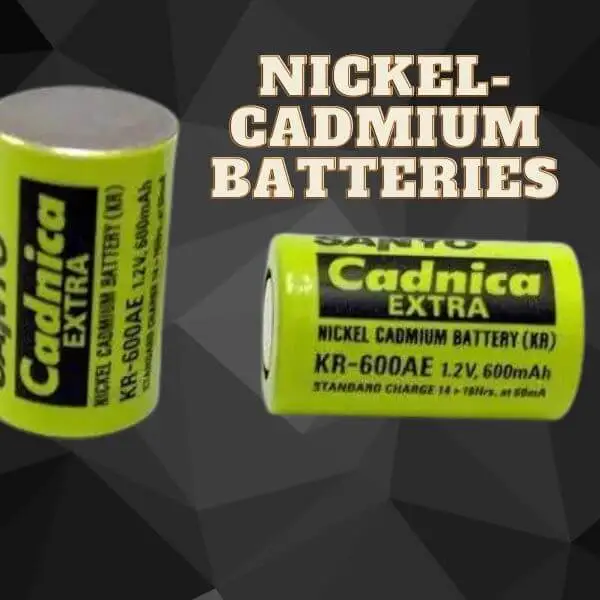
3. Nickel-cadmium batteries
Nickel-cadmium batteries provide longer battery life at a much lower cost than other types of cells but tend to be larger and heavier due to their chemical makeup, which also dictates that they should have a slow charge rate for optimal performance.
No matter what type of electric scooter battery you decide on it is important that you follow the specific charging instructions of your device’s instructions manual in order to ensure optimal performance from your vehicle’s electrical system and extend the life of the battery itself–giving you more reliable rides for longer!
Step-by-Step Guide for How to Charge Electric Scooter Battery
Owning an electric scooter is an easy and exciting way to travel. But properly charging the battery is an important step in maintaining optimal performance. Do not charge your scooter battery after using it, make sure to cool it down for 15 minutes first. Here’s a step-by-step guide on how to charge electric scooter battery at home:
- Start by finding the charging port of your electric scooter. This will be located near the handlebar or near one of the wheels, depending on the model, so refer to your user manual if you cannot find it.
- Connect the charger cable to your electric scooter and plug it into a standard power socket. Make sure that there are no obstructions between the charger and the power outlet so that the current can flow freely without interruption.
- After connecting your scooter to a power source, check whether there is an indicator light that confirms that charging has started successfully or not, as this will indicate the correct connection of components and enable tracking of battery life while charging (refer to the specific product manual).
- Leave it alone while it charges: Depending on how powerful your battery is and how far depleted it was initially, most electric scooters can reach full charge when left overnight, usually after 8 hours of continuous charging time has passed since the initial connection to the power source.
- Turn off your charger once you notice its indicator light changing from red (charging) status to green (full charge) status or when you notice a total voltage sum reading reaching approximately 48V, whichever comes first (see product’s user manual for a more detailed explanation).
- Disconnect the charger from both the electric scooter and the power source immediately after turning off the charger for safety procedures as soon as you realize that status has been reached for optimal results during the use of the device in the near future.
By following these steps, you ensure proper maintenance habits, which ultimately extend the life of your electric scooter batteries while they are in regular use!
The Role of Temperature in Electric Scooter Battery Charging and Performance
The temperature between fully charged and depleted electric scooter batteries can make a significant difference in both the charging performance and overall longevity of your e-scooter. When it is too hot or too cold, the battery won’t be able to recharge as efficiently.
In extreme winter temperatures, it’s important to charge your electric scooter battery just enough to get you going so that you don’t drain the battery completely or cause it to overcharge. Cold temperatures also require a decrease in charging times and an increase in discharge rates to prevent long-term battery damage if left unattended for too long.
Charging your electric scooter battery at higher temperatures can be risky if the temperatures are extreme, as it increases the risk of overcharging, which can be damaging to the life of your battery. If you often ride in warm weather or keep your e-scooter idle outside for a long period during summer, make sure that the scooter is properly ventilated and parked in a shaded area while charging so that it reaches optimal temperature while recharging.
Another temperature-related issue often faced by e-scooters users is why won’t my electric scooter turn on? A common reason behind this issue is usually due to low temperatures as dirt, moisture, dust, and changing temperatures deplete the battery life faster than usual, leaving you with an unresponsive machine.
Cold winter days will require regular maintenance of your e-scooter batteries to ensure optimum longevity and performance under extreme weather conditions. This will help you avoid any future surprises when trying to start up your vehicle on cold winter mornings!
Extending Battery Life: Tips for Proper Charging and Maintenance
Owning an electric scooter means taking the necessary steps to ensure maximum performance. Charging and properly maintaining your electric scooter’s battery will extend its life and ensure that it works at its best. The most important factor in prolonging battery life is knowing when to plug in so you don’t overcharge, which can cause permanent damage.

Before plugging in any chargers near your electric scooter, make sure you read all safety instructions. After unplugging your scooter from wall outlets or other charging sources, cool down the battery for a few hours before attempting to charge again with an electric scooter battery charger. In order to maintain optimal performance, store the electric scooter between 40-70 percent charged or use a low-to-medium charge setting on your charger.
When using electronics such as your mobile phone or laptop, batteries should also be completely uncharged before each storage period, since any kind of charge can age them prematurely if left for extended periods of time–even when they seem like they’re off. Try not to keep them fully charged for long periods; this can reduce their lifespan fairly quickly over time as well.
Following these tips will help extend the life of your battery while maximizing its performance in the long run!
Common Charging Mistakes to Avoid
Charging your electric scooter battery correctly is essential in order to get the full benefit from your device. Failure to adhere to the instructions provided by your manufacturer can result in reduced performance, or worse, damage to the battery. The following are the most common mistakes that should be avoided when charging your electric scooter battery:
- One mistake people often make is leaving their electric scooter battery plugged in overnight or for extended periods of time. This is a big no-no as it can lead to overcharging and therefore faster deterioration of the battery’s life cycle. Only charge the battery until it reaches maximum capacity and then unplug it immediately.
- Also, be sure to regularly inspect your connection cable for any fraying fabric or discontinuities, as these can create possible arcing or fire hazards over time if left unattended. Additionally, avoid tying up excess cords around the charger housing for safety reasons; instead, find an alternative way to store it out of reach when not in use.
- Finally, don’t forget that charging batteries at temperature extremes greatly affects performance; manufacturers typically list an optimum charging temperature range on product labels; always reference this information when planning how and where you’ll mount and charge your electric scooter battery for optimal performance output.
Avoiding these common charging mistakes will help ensure a longer lifespan for your electric scooter’s battery and you wont have to fix your electric scooter often!
How to Read and Interpret Electric Scooter Battery Indicator Lights
Recharging your electric scooter battery is essential to prolonging its life and keeping it running at optimal performance. It’s important to understand the indicator lights that display the status of your battery charge. This will enable you to know when to recharge as well as how long it should take for your electric scooter battery to reach a full charge.
When you plug in your scooter for charging, taking note of the indicator lights is critical. Most electric scooters have either red, yellow or green LED lighting that gives an indication of whether it is charging or not. Usually, a red light means that the scooter is not charging and could be due to an issue with either the charger, power source, or connection.
On the other hand, if you see a yellow light indicating that your electric scooter battery is charging and usually will take from 1 to 5 hours depending on various factors such as its size and type, how drained it was prior to recharging, weather conditions, etc. When it’s fully charged, most models will turn green, displaying ‘full’ or ‘charger complete’ on their indicator lights, which indicates that you can uninstall the charger safely without diminishing its performance capability.
The duration taken for charging may vary according to leading brands like Razor, but generally speaking, takes around 4 hours (depending on the model). If this amount of time has passed but your electric scooter has not reached a full charge yet. Then there could be something wrong with either the charger or power outlet, so make sure you investigate further before continuing the use of your device. Remembering these tips will help ensure the safe and efficient use of your electric scooter day after day!
Always lock your electric scooter when leaving it outside so that no one can steal it.
Understanding the Relationship Between Battery Capacity and Electric Scooter Range
When it comes to keeping your electric scooter running, understanding the relationship between battery capacity and electric scooter range is essential for optimal performance. As with many types of rechargeable batteries, electric scooters rely on how well you charge them to determine how long they will last and the type of travel experience you receive. The amount of energy stored in the battery is directly related to its capacity or Amp-Hour (Ah), and this determines your range.
The capacity of a battery is determined by many factors, including charge rate, operating temperature, age, and usage pattern. A low rate of charging reduces the heat that builds up during charging, which can reduce stress on the internal components and extend battery life. Take caution when using fast chargers since levels of Amperage that exceed manufacturer recommendations can increase heating rates, which could damage the battery over time.
Knowing how long it takes to charge your scooter’s battery is key in understanding its potential range too—the amount of runtime after a full charge varies by model but they generally last between 10-25 miles depending on terrain type, weight, etc.
If you are wandering that can you use an electric scooter as a normal scooter, you can read my post about it.
Having an understanding of these things helps ensure your electric scooter keeps running efficiently for longer periods—helping you get where you want to go safely!
Troubleshooting Electric Scooter Battery Charging Issues
Troubleshooting Electric Scooter Battery Charging Issues requires an understanding of how to properly and safely charge the battery. As a general rule, electric scooter batteries need to be charged using the applicable charger. The charger will typically come with the scooter and should never be used with any other type of electrical devices, such as a laptop or phone charger. Using the proper charger is important as incorrect charging may damage the battery and could cause unwanted complications.
If an applicable charger is not available, there are several troubleshooting options available for charging a scooter battery without one. Some models are designed to be charged from an outlet directly, while others require the use of a 12v car adapter or other specialized adapters that can be sourced from electronics stores or online retailers.
However, regardless of whether you’re using a designated electric scooter charger or another type of support for charging, safety should always be considered first when dealing with electrical components like those associated with your electric scooter battery. Every device has different specifications related to power input and output, so it’s important that you check your manual to make sure that you are following all precautionary measures while charging your electric scooter battery.
By taking precautions and troubleshooting careful consideration before you begin charging, you can help ensure maximum performance while minimizing risks of damage due to incorrect usage.
What are the risks of not charging an electric scooter battery?
Electric scooters are a popular and convenient way to get around town, but it is essential to understand the potential risks of not properly charging your battery. If you are frequently forgetting to charge your electric scooter or don’t charge it correctly, you may find that your electric scooter won’t turn on from time to time even after recharging it. When this happens, it may be difficult to diagnose the issue and identify what part of the battery system is not functioning correctly.
To minimize the risk of your electric scooter not turning on due to insufficient charging or lack thereof, be sure to adhere to all manufacturer recommendations when recharging the battery. Most guides suggest specifically avoiding overcharging or under-charging batteries, as any drastic changes in voltage can affect performance in the short run and longevity in the long run. Additionally, many guides also indicate that users should avoid leaving an electric scooter connected overnight on its charger; it is important for users to use their own judgment when determining how much charge their particular battery needs for optimal performance and remember that more does not always mean better when attempting to charge an electric scooter.
It is also necessary for users with electric scooters equipped with removable batteries to familiarize themselves with best practices for storing these batteries when out of use. Keep in mind that we should always store away batteries from moisture and extreme temperatures — constantly warm climates can reduce a battery’s lifespan while cold climates may cause insufficient charging, resulting in reduced performance.
Overall, whether you have an integrated or removable battery system, be sure you adhere to all recommended guidelines when recharging and storing your cell if you expect optimal performance out of your vehicle!
How often should you charge an electric scooter battery?
When it comes to charging your electric scooter battery, the answer may not always be straightforward. The frequency with which you need to charge an electric scooter depends on several factors usage, the type of battery, and the overall condition of the battery. Generally, the manufacturer will provide guidelines suggesting a recommended charging frequency in their user manual.
Regularly charging your scooter battery is important to ensure its longevity and optimal performance. It’s best to avoid completely draining the battery, as this can lead to reduced capacity over time or even permanent damage in some cases. If you find that your electric scooter won’t charge, try plugging it into a different outlet or checking for any loose connections between devices and charger cords.
If you use your electric scooter frequently during long-distance trips or rides at high speeds, it is important to charge them more often than those who don’t use them so frequently. A general rule of thumb is that if you ride for more than 4 hours per day or approximately 250 km, then you will want to recharge once every week. In any case, make sure that your batteries are fully charged at least once a month regardless of frequency of use to ensure optimal performance and lifespan expectancies as outlined by manufacturer specifications.
What happens if you overcharge an electric scooter battery?
When charging the electric scooter battery, it is important to understand the maximum voltage output of your particular battery and the optimum time span to charge it. Overcharging an electric scooter battery may cause damage to its electrical components due to a disproportionate amount of current being delivered. This can occur if the charger you are using is not rated for your device or if you are leaving the battery for too long.
If your electric scooter charger does not automatically shut off when fully charged, then you should make sure that you monitor the charging time and unplug it at regular intervals. This will ensure that there is no excess current in your system and no damage caused to any of its electrical components. Additionally, keeping an eye on your electric scooter charging time, i.e., limiting it from 8 to 10 hours a day with 15 minutes rest period in between, will ensure that your battery is not subject to sudden surges or ongoing overcharging.
It may be tempting to charge your electric scooter battery overnight, but this can lead to a significant decrease in total power delivery over extended periods of time. Furthermore, when charged slowly, batteries do not reach their full potential as energy may become trapped in their interior cells due to oxidation, which undercuts their efficiency.
Therefore, it is important that you adhere strictly to recommended charging settings per manufacturer directions and use only specifically designed chargers so as to protect against product malfunction in accordance with approved safety standards of making sure that neither yourself nor your property experience any harm or damage while using the electric scooter or while charging its battery.
What happens when you overcharge an electric scooter battery?
- You may not be able to achieve a full charge when overcharging your battery due to reduced capacity caused by damage from heat or excessive current.
- Overcharging an e-scooter battery may cause damage such as overheating, swelling, and breaking of cells, reduction in performance levels due to reduced energy storage capacity and increased draining speed/internal resistance, which reduces power output capacities.
You can get to know here The 10 Best Pro Scooter Wheels: Which Ones are They?


Blog
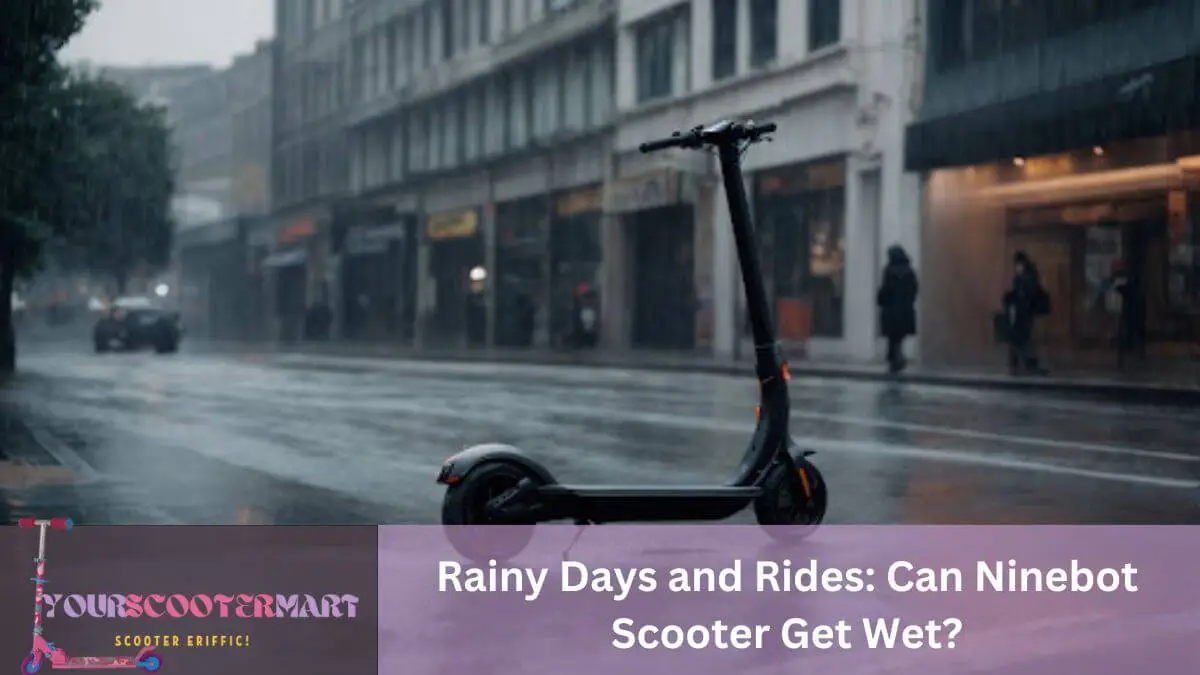
Rainy Days and Rides: Can Ninebot Scooter Get Wet?
Can Ninebot Scooter Get Wet? Don’t let rain ruin your ride! Learn about Ninebot Scooter’s water resistance features and steps to keep it safe in wet conditions.
Can Ninebot Scooter Get Wet? Don’t let rain ruin your ride! Learn about Ninebot Scooter’s water resistance features and steps to keep it safe in wet conditions.
Have you ever wondered if your Ninebot scooter can survive the rain? It’s a common concern for many riders, as no one wants to risk damaging their valuable mode of transportation. In this article, we will explore the question “Can Ninebot scooter get wet?” and the potential risks of getting your Ninebot wet and provide tips on how to protect it.
Can Ninebot Scooter Get Wet?
Ninebot scooters are not entirely waterproof, but they are water-resistant. I do not advise it to expose a Ninebot scooter to water as it is not waterproof. The electrical components can be damaged and affect the performance of the scooter. If you must use the scooter in wet conditions, I recommend taking precautions such as using a waterproof cover or avoiding puddles. Keeping the scooter dry will help preserve its functionality and prevent potential damage. Always follow the manufacturer’s guidelines and recommendations to ensure the proper maintenance of your Ninebot scooter.

Table of Contents
Here is a table summarizing the water resistance of Ninebot scooters:
| Ninebot Model | Water Resistance of Ninebot Scooter | Riding Conditions |
|---|---|---|
| Segway Ninebot | Water-resistant | Light rain or splashes |
| Ninebot ES2 | I do not recommend using it in the rain | – |
| Ninebot MAX G30 | Can resist a sustained, low-pressure water jet spray | Light to moderate rain |
They do not design most Ninebot models to be used in heavy rain or submerged in water, and riding them in such conditions can cause damage to the components. However, light rain or splashes should not cause significant problems if the scooter is moving. The Ninebot MAX G30 is one of the best water-resistant scooters to drive in the rain, but riders should still be careful of deep puddles and slippery surfaces.
What is a Ninebot Scooter?
A Ninebot scooter is a type of electric personal transportation device that is designed for short-distance travel. It is a compact and lightweight vehicle with two wheels and a handlebar for steering. A rechargeable battery powers the scooter and comes equipped with features such as adjustable speed settings, LED lights, and a mobile app for control and monitoring. I value Ninebot scooters for their durability, maneuverability, and environmentally friendly design.
It is important to always consult the user manual for specific guidelines on water resistance and to avoid exposing the Ninebot scooter to excessive moisture to maintain its longevity and performance.
What Are the Risks of Getting a Ninebot Scooter Wet?
Exposing a Ninebot scooter to water can lead to various risks, such as damage to its electrical components, corrosion, and decreased performance. Water can enter the scooter’s internal circuitry, causing short circuits or malfunctions. Over time, corrosion can also affect the scooter’s metal parts, resulting in rust and deterioration. Riding a wet Ninebot scooter can compromise its traction, stability, and braking efficiency, increasing the chances of accidents.
To prevent these risks, it is crucial to protect the scooter from water damage by using a waterproof cover, avoiding riding in heavy rain, and thoroughly drying and storing it in a dry place. If the scooter comes into contact with water, you should immediately turn it off, dry it thoroughly, and inspect for any damage before using it again. As an alternative to riding a wet Ninebot scooter, consider using public transportation or other forms of transportation during rainy weather.
How to Protect Your Ninebot Scooter from Water Damage?
As a proud owner of a Ninebot scooter, you may wonder how to protect your beloved ride from water damage. While these scooters withstand some moisture, prolonged exposure to water can cause serious damage. Now I will discuss four ways to protect your Ninebot scooter from water damage. From using a waterproof cover to proper storage techniques, we’ve got you covered so you can keep riding worry-free.
1. Use a Waterproof Cover
Using a waterproof cover is crucial for protecting your Ninebot scooter from water damage. Here are the steps to follow:
- Choose a high-quality waterproof cover specifically designed for Ninebot scooters.
- Make sure the cover completely covers the scooter, including the handlebars and wheels.
- Secure the cover tightly to prevent water from seeping in.
- Regularly check the cover for any tears or damage and replace if necessary.
Fact: A waterproof cover not only shields your scooter from rain but also guards it against dust, dirt, and UV rays.
2. Avoid Riding in Heavy Rain
For riding a Ninebot scooter in heavy rain, it is best to avoid it altogether to prevent potential damage and risks. Here are some steps to take:
- Check the weather forecast before heading out.
- If you expect heavy rain, it is advisable to use alternative modes of transportation.
- If caught in unexpected rain, it is important to find shelter or wait for the rain to subside.
- To protect the scooter from the rain, use a waterproof cover or store it in a dry place.
- If you must ride in light rain, it is crucial to be cautious and reduce speed to maintain control.
Remember, the safety of both the rider and the scooter should always come first. Stay dry and ride responsibly!
3. Dry the Scooter Thoroughly after Use
To ensure the longevity and performance of your Ninebot scooter, it’s important to dry it thoroughly after each use. Follow these steps:
- Use a dry cloth to wipe down the entire scooter, paying special attention to areas that may have accumulated moisture.
- Remove any excess water by gently shaking the scooter or using a soft brush to dry hard-to-reach areas.
- Avoid exposing the scooter to direct sunlight or heat sources as it dries, as this may cause damage.
- Leave the scooter in a well-ventilated area to air dry completely before storing it.
Fact: Properly drying your Ninebot scooter after use helps prevent rusting and prolongs its lifespan.
4. Store the Scooter in a Dry Place
To ensure the longevity of your Ninebot scooter, it is crucial to store it in a dry place. Here are some steps to follow:
- Choose an indoor storage location to protect the scooter from rain, humidity, and moisture.
- Use a scooter cover to shield it from dust and potential water exposure.
- Ensure the storage area has proper ventilation to prevent condensation buildup.
- Avoid storing the scooter near windows or doors that could allow water to seep in.
By following these steps, you can safeguard your Ninebot scooter from water damage and maintain its performance.
Read the review of Hiboy S2 Pro electric scooter.
What to Do If Your Ninebot Scooter Gets Wet?
Accidents happen, and sometimes your Ninebot scooter may end up getting wet. Whether it’s from rain, a puddle, or a spill, water can damage your scooter if not handled properly. Now, I’ll discuss the steps to take if your Ninebot scooter gets wet. From turning off the scooter immediately to thoroughly drying it and checking for damage, we’ll cover everything you need to know to keep your scooter safe and functional.
1. Turn Off the Scooter Immediately
If your Ninebot scooter gets wet, it is crucial to turn it off immediately to prevent further damage. Here are the steps to follow:
- Power off the scooter by pressing the power button.
- Disconnect the battery to avoid any electrical short circuits.
- Remove any excess water by gently patting the scooter with a dry cloth.
- Let the scooter air dry completely before attempting to turn it back on.
2. Dry the Scooter Thoroughly
To ensure your Ninebot scooter stays in top condition, it is crucial to properly dry it after use. Follow these steps:
- Take a clean and dry cloth and wipe down the entire scooter, including the handlebars, deck, and wheels.
- Be sure to pay extra attention to any areas where water may have accumulated, such as around the charging port or under the fender.
- If needed, use a compressed air canister or a hairdryer on a low, cool setting to remove any remaining moisture.
- Allow the scooter to air dry in a well-ventilated area for a few hours before storing it.
True story: One rainy day, I made the mistake of forgetting to dry my Ninebot scooter after riding it. The following day, I discovered that water had seeped into the control panel, causing it to malfunction. I had to take it to a repair shop and learned the importance of thoroughly drying the scooter to prevent water damage.
3. Check for Damage
- After your Ninebot scooter gets wet, it’s important to carefully inspect for any potential damage to ensure safe operation.
- Check all electrical components for any signs of water damage, such as corrosion or rust.
- Examine the battery and charging port to ensure they are completely dry and free from any moisture.
- Inspect the tires and brakes for any water-related issues, such as reduced traction or damage.
- Test the functionality of the scooter, including acceleration, braking, and steering, to ensure there are no issues.
- If you notice any damage, I highly recommend contacting the manufacturer or a certified repair service for further help.
Is it Safe to Ride a Wet Ninebot Scooter?
Riding a wet Ninebot scooter can be hazardous and should be avoided. Wet surfaces can affect the traction and stability of the scooter, increasing the risk of accidents and injuries. Water can also cause damage to the scooter’s electrical components, resulting in malfunctions. I recommend it to wait for both the scooter and the ground to dry before riding. If you get your Ninebot scooter wet, be sure to thoroughly dry it before attempting to ride again. Safety should always be the top priority when using any type of electric scooter.
Here is a true historical anecdote:
In 2019, a man in California rode his Ninebot scooter after a heavy rainstorm. Despite being cautious, he lost control on a wet patch and suffered a serious injury. This incident serves as a reminder of the importance of avoiding riding a wet Ninebot scooter to ensure personal safety.
What Are the Alternatives to Riding a Ninebot Scooter in the Rain?
To avoid damaging the electrical components of a Ninebot scooter and to stay safe and dry, there are several alternatives to consider when traveling in rainy weather:
- Public transportation: Buses, trains, or trams can reach your destination.
- Ride-sharing: We can use services like Uber or Lyft as a means of transportation during wet weather.
- Car rental: Renting a car can provide a reliable and comfortable option for traveling on rainy days.
- Walking or jogging: For shorter distances, walking or jogging can be a healthy and weather-resistant alternative.
- Cycling: We can use a waterproof bicycle or rain gear as a weather-resistant option.
Conclusion
“Can Ninebot scooter get wet?” is a crucial question for scooter owners like me. After thorough research and personal experience, it’s clear that exposing your Ninebot scooter to water is not advisable. Water can damage crucial components and compromise the scooter’s functionality. To ensure the longevity of your investment, it’s best to keep your Ninebot scooter dry and protected from wet conditions. Remember, prevention is key to maintaining the performance and safety of your scooter.
Frequently Asked Questions
Can Ninebot Scooter Get Wet?
A Ninebot scooter is water-resistant and can handle light rain or splashes. However, I do not recommend submerging the scooter in water or riding it in heavy rain as it may damage the internal components.
What Happens If a Ninebot Scooter Gets Wet?
If a Ninebot scooter gets wet, it may malfunction or stop working temporarily. Water can damage the electrical components of the scooter, causing it to have issues with acceleration, braking, or turning. It is best to dry the scooter thoroughly before attempting to use it again.
How Can I Protect My Ninebot Scooter from Getting Wet?
To protect your Ninebot scooter from getting wet, you can invest in a waterproof cover or store it indoors or under a shelter when not in use. You can also consider applying a silicone spray or water-resistant coating to the scooter’s external parts to provide an extra layer of protection.
Can I Ride My Ninebot Scooter through Puddles or Wet Roads?
I do not recommend riding your Ninebot scooter through puddles or wet roads as it can damage the scooter’s internal components. Water can also make the road slippery, increasing the risk of accidents. It is best to avoid wet surfaces and find an alternate route if possible.
What Should I Do If My Ninebot Scooter Gets Wet?
If your Ninebot scooter gets wet, the first thing you should do is turn it off and disconnect the battery. Then, dry off the scooter with a towel or cloth and let it air dry for several hours. Avoid using a hairdryer or any heat source to dry the scooter as it may cause further damage.
Is the Warranty Void If My Ninebot Scooter Gets Wet?
Most Ninebot scooter warranties do not cover water damage, so if your scooter gets wet, the warranty may be void. It is essential to read the warranty terms and conditions before purchasing a Ninebot scooter and follow the manufacturer’s guidelines to avoid any issues with warranty claims.
Blog
The Need for Speed: How Fast Are the Bird Scooters?
Discover how fast are the Bird scooters in this revealing exploration. Zip through cityscapes with unmatched efficiency, ensuring a swift ride.

Bird scooters have a maximum speed of 15 to 18 miles per hour
Looking for a quick and convenient way to get around the city? Then you’ve probably heard of the popular electric scooters known as Bird scooters. But just how fast are the bird scooters? With concerns over safety and regulations, it’s important to understand the speed capabilities of these scooters. It might surprise you to learn just how speedy they can be.

Table of Contents
How Fast are Bird Scooters?
Here is a table showing the top speed of Bird scooters
| Maximum speed of Bird Scooters | |
|---|---|
| Model | Maximum Speed |
| Bird Air | 16 miles per hour |
| Bird One | 18 miles per hour |
| Other Bird scooters | 15 to 17 miles per hour |
| Bird E-Scooters in pedestrian-dense areas | Automatically reduced to 8 miles per hour |
What Is the Average Speed of a Bird Scooter?
The average speed of a Bird scooter is approximately 15 miles per hour. The specific speed may vary depending on factors such as the weight of the rider, the condition of the road, and the level of the battery. They designed Bird scooters for brief trips and urban commuting, and are not intended for high-speed travel. It is crucial to adhere to local traffic laws and ride responsibly when using a Bird scooter.
What are Bird Scooters?
Bird scooters are electric scooters that you can rent through a mobile app. They are a popular part of the shared micro-mobility trend, offering a convenient and eco-friendly mode of transportation in urban areas. Users can easily locate and unlock the scooters using the app, ride them to their destination, and then park them in designated areas.
These scooters have quickly gained popularity for short-distance travel, helping to reduce traffic congestion and carbon emissions. They have become a common sight in many cities, with thousands of riders using them daily to navigate their way around town. Another example of scooters that you can rent are Lime scooters.
| Features of Bird scooters | |
|---|---|
| Feature | Description |
| Top Speed | Approximately 18 miles per hour. |
| Range | Up to 25 miles. |
| Motor | 36V, 300 W. |
| Battery | 12.8 Ah, 36 V, 473.6 Wh. |
| Braking System | Electronic front regenerative brake system. |
| Safety Features | Ultra-efficient brakes, ergonomic firm-grip handlebars, texturized deck, GPS connection, and anti-theft protection. |
How Do Bird Scooters Operate?
Bird scooters operate through a simple process that allows users to easily rent and ride them. Here are the steps involved in how Bird scooters operate:
- Locate a nearby Bird scooter using the mobile app.
- Scan the QR code on the scooter to unlock it.
- Adjust the kickstand and put on a helmet for safety.
- Begin riding the scooter by pushing off with one foot and using the throttle to speed up.
- Observe all traffic laws and regulations while riding.
- Once you reach your destination, park the scooter in a designated area and end your ride through the app.
- Lock the scooter properly before leaving.
To ensure a smooth and enjoyable experience with Bird scooters, here are some suggestions:
- Always wear a helmet and follow local traffic laws.
- Charge the scooter responsibly to avoid running out of battery during your ride.
- Report any issues or damages to Bird customer support.
- Be considerate and park the scooter in designated areas to avoid blocking pathways.
What Are The Speed Limits For Bird Scooters?
With electric scooters, one of the first questions that may come to mind is “How fast can they go?” While the top speed of a scooter may vary depending on the model and manufacturer, there are also specific speed limits in place for safety reasons.
Are There Different Speed Limits in Different Countries and Cities?
Yes, there are varying speed limits for Bird scooters depending on the city. Each city has its own set of regulations regarding the use of e-scooters, which includes speed limits. While some cities may have a standard speed limit for all electric scooters, others may have specific limits for certain areas or types of roads. Riders must be mindful of and adhere to the speed limits enforced by the city they are in guaranteeing their safety and abide by local laws. Disregarding speed limits can lead to fines or other penalties.
Bird Scooters are available in many countries outside the United States, including Canada, France, Germany, Spain, and Australia. It’s important to note that the speed limits for Bird Scooters may differ in each country because of local regulations. For instance, in Australia, the maximum speed for electric scooters on public roads is 25 km/h (15.5 mph).
To ensure both safety and compliance with local transportation authorities, riders must familiarize themselves with the laws and regulations regarding speed limits when riding Bird Scooters in other countries. Riders should also take into consideration factors such as traffic conditions, road conditions, and pedestrian density for a safe and enjoyable experience while riding abroad.
What Factors Affect The Speed Of Bird Scooters?
Have you ever wondered how fast those popular Bird scooters can go? Well, the answer is not as simple as you may think. Several factors can affect the speed of a Bird scooter. Now I will discuss these factors and how they can affect the overall speed of the scooter. From battery life to terrain to the weight of the rider, each element plays a role in determining just how fast a Bird scooter can go. These also prolong the life of electric scooters.
Let’s dive in to explore the various factors that contribute to the speed of these trendy modes of transportation.
1. Battery Life
Battery life is an essential aspect to consider when using Bird scooters. To ensure a smooth ride and maximize battery performance, please follow these steps:
- Before starting your ride, always check the battery level.
- Try to avoid excessive acceleration and braking, as this can quickly drain the battery.
- Stick to the recommended weight limits to prevent overburdening the battery.
- Avoid riding on steep terrains or rough surfaces, as this can significantly increase battery usage.
- Be sure to charge the scooter regularly and avoid letting the battery drain completely.
A friend of mine learned the hard way when they rented a Bird scooter without checking the battery life. Unfortunately, the battery died midway through their ride, leaving them stranded far from their destination. Since then, they always make it a point to check the battery level before starting their journey.
Pro-tip: To prolong battery life, maintain a moderate speed and avoid sudden accelerations.
2. Terrain
With riding Bird scooters, the terrain can have a significant impact on your speed and overall experience. To ensure a safe and enjoyable ride, here are a few steps to consider:
- Be aware of the terrain: Pay attention to the type of surface you’re riding on, whether it’s smooth pavement, gravel, or hills.
- Adjust your speed: Slow down when riding on uneven or slippery terrain to maintain stability and prevent accidents.
- Take turns carefully: Reduce your speed and approach turns cautiously, especially on uneven or loose surfaces.
- Watch out for obstacles: Be mindful of potholes, bumps, or debris on the road that could cause you to lose control.
- Choose the right scooter model: Consider renting a scooter with larger wheels or enhanced shock absorption if you plan to ride on rough terrain frequently.
In 2021, Bird introduced an upgraded scooter model designed specifically for off-road adventures. With improved suspension and rugged tires, riders can now confidently tackle various terrains, including dirt trails and grassy parks, while enjoying a smooth and exhilarating ride. So, whether you’re exploring urban streets or venturing off the beaten path, Bird scooters have you covered.
3. Weight of Rider
The weight of the rider is a crucial factor that affects the speed and performance of Bird scooters. To ensure a safe and optimal riding experience, here are some steps to consider regarding rider weight:
- Check the weight limit: Before riding a Bird scooter, always check the weight limit specified by the company. Exceeding this limit can affect the stability and speed of the scooter.
- Choose the right scooter: For heavier riders, I recommend selecting a scooter model that can accommodate higher weights.
- Adjust riding style: Be mindful of your riding style and try to distribute your weight evenly on the scooter. This can help maintain balance and optimize the scooter’s performance.
- Consider battery life: Heavier riders may experience shorter battery life due to increased power consumption. Plan your rides accordingly and be aware of the scooter’s battery level.
- Follow safety guidelines: It is crucial to adhere to all safety guidelines provided by Bird, regardless of your weight. This includes wearing a helmet, following traffic rules, and riding responsibly.
Are There Any Safety Concerns With Bird Scooters?
As the popularity of electric scooters continues to rise, more and more people are turning to services like Bird for convenient and eco-friendly transportation. With this increase in usage also comes the question of safety.
Now I will discuss potential safety concerns with Bird scooters, including accidents and injuries that have occurred, as well as potential malfunctions of the scooters themselves. By understanding these risks, users can make informed decisions about their safety when riding Bird scooters.
1. Accidents and Injuries
Accidents and injuries can happen while using Bird scooters. To ensure safe riding, follow these steps:
- Wear a helmet to protect your head in case of a fall or collision.
- Observe traffic rules and signals, just like when riding a bicycle or driving a car.
- Ride in designated areas and avoid sidewalks to minimize the risk of colliding with pedestrians.
- Be cautious when riding at night and ensure your scooter has proper lighting.
- Regularly inspect your scooter for any malfunctions or issues before riding.
- Keep a safe distance from vehicles and other obstacles to avoid accidents.
- Stay focused and avoid distractions such as using your phone while riding.
2. Scooter Malfunctions
Scooter malfunctions can pose safety risks for riders. To ensure safe and responsible riding, follow these steps:
- Regularly inspect the scooter for any visible damage or loose parts.
- Check the brakes before each ride to ensure they are working properly.
- Pay attention to any unusual noises or vibrations while riding, as they may show a mechanical issue.
- If you encounter a malfunction during your ride, safely pull over to the side of the road and turn off the scooter.
- Contact the Bird Scooters customer support immediately to report the issue and seek help.
- Do not fix the malfunction yourself, as it may cause further damage or put you at risk.
- Wait for the customer support team to provide instructions on what to do next.
- Once they resolve the scooter malfunctions, only continue riding if you feel confident in the scooter’s safety.
What Are The Benefits of Bird Scooters?
Bird scooters offer many benefits for both urban commuters and travelers. These include:
- Convenience: With their widespread availability in many cities, Bird scooters provide a convenient mode of transportation for quick trips.
- Cost-effective: Compared to other transportation options, Bird scooters are a relatively inexpensive choice, making them a cost-effective way to get around.
- Eco-friendly: By using electric scooters, riders can help reduce carbon emissions and promote a cleaner environment.
- Timesaving: Bird scooters can help riders avoid traffic congestion, allowing them to easily navigate through crowded areas and save time during their commute.
- Health and wellness: Riding a Bird scooter provides a low-affected exercise opportunity, contributing to improved physical fitness and overall well-being.
True story: A friend of mine recently used a Bird scooter to navigate through downtown traffic and arrived at her meeting on time. The convenience and ease of use pleasantly surprised her, and now considers Bird scooters her go-to mode of transportation for short distances in the city.
What Are The Drawbacks of Bird Scooters?
While Bird scooters offer convenience and flexibility for short-distance travel, there are also some drawbacks to consider.
- Safety concerns: Some users may not always wear helmets or follow traffic rules, increasing the risk of accidents.
- Parking issues: We often leave scooters in random or obstructive places, causing inconvenience for pedestrians and other road users.
- Charging and maintenance: Maintaining a fleet of scooters requires regular charging, repairing, and redistributing, which can be time-consuming and costly.
Despite these drawbacks, Bird scooters have become popular in many urban areas because of their accessibility and affordability. In fact, since their launch in 2017, Bird has expanded to over 100 cities worldwide.
How Can Riders Ensure Safe and Responsible Riding of Bird Scooters?
To ensure the safe and responsible riding of Bird scooters, riders should follow these steps:
- Wear a helmet to protect your head in case of accidents.
- Observe traffic rules, including stopping at red lights and yielding to pedestrians.
- Ride at a safe and reasonable speed, considering the environment and other road users.
- Be aware of your surroundings and expect potential hazards or obstacles.
- Use designated bike lanes when available and avoid riding on sidewalks or crowded pedestrian areas.
- Do not ride under the influence of alcohol or drugs, as it impairs judgment and reaction time.
- Park scooters in designated areas and avoid blocking walkways or obstructing traffic.
- Report any accidents, issues, or damages to Bird for prompt resolution.
Conclusion
“How fast are the Bird scooters?” is a question that underscores the notable speed and efficiency these electric rides provide. Navigating through urban environments with swiftness, Bird scooters offer a rapid and convenient mode of transportation, catering to the need for quick and efficient travel in urban settings. Riders can experience the thrill of speed while reaching their destinations promptly, making Bird scooters a popular choice for those seeking a fast and convenient urban mobility solution.
Frequently Asked Questions
-
How fast are the Bird scooters?
According to the company, Bird scooters can reach a maximum speed of 18 miles per hour.
-
Are the Bird scooters faster than other modes of transportation?
It depends on the distance and traffic conditions. In busy cities with heavy traffic, Bird scooters may be faster than cars or public transportation.
-
What factors can affect the speed of a Bird scooter?
Factors can affect the speed of a Bird scooter such as the rider’s weight, terrain, and battery life.
-
Is there a speed limit for Bird scooters?
Yes, Bird scooters have a built-in speed limit of 15 miles per hour to ensure rider safety.
-
Can the speed of a Bird scooter be adjusted?
No, the speed of a Bird scooter is not adjustable. They set it at a maximum speed of 15 miles per hour for safety reasons.
-
How can I find out the speed of a Bird scooter in my area?
You can use the Bird app to locate and unlock a nearby Bird scooter, and the app will display the current speed of the scooter during your ride.
Blog
How Long Do Electric Scooters Last? Unveiling the Secrets
Unleash the secret lifespan of electric scooters! 🛴✨ Discover how long do electric scooters last and ensure your wheels go the extra mile! 🔋#ScooterLongevity

Are you wondering about the lifespan of an electric scooter? With the rise in popularity of this mode of transportation, it’s important to understand how long do electric scooters last before needing to be replaced. In this article, I will dive into the factors that affect its lifespan and provide useful information to help you make an informed decision.
On average, an electric scooter can last anywhere between 3 to 5 years. The lifespan of an electric scooter depends on various factors such as battery type and age, charging habits, temperature, brand, rider weight, quality of components, and care and maintenance. The more often you ride your scooter, the faster its components will wear down, including the battery, motor, and tires. Proper care and maintenance can extend the lifespan of an electric scooter.

Table of Contents
What Are Electric Scooters?
Electric scooters are motorized vehicles that are powered by electricity and designed for brief trips and urban commuting. They offer a more environmentally friendly option compared to traditional transportation methods. Equipped with rechargeable batteries and an electric motor, electric scooters can travel at various speeds depending on the model. They are popular for transportation in busy cities because of their compact size and easy maneuverability.
As the use of electric scooters continues to grow, many cities have implemented scooter-sharing programs, making them easily accessible to the public. Electric scooters provide a convenient and sustainable mode of transportation for those looking to reduce their carbon footprint.
How Long Do Electric Scooters Last?
| Lifespan of electric scooters | |
|---|---|
| Electric scooter | Lifespan |
| Average lifespan of an electric scooter | 3 to 5 years |
| Lifespan of rental electric scooters | 3 to 6 months |
| Lifespan of personal electric scooters | up to 3 years |
| Lifespan of electric scooter batteries | 300 to 500 full charge cycles, which usually take 2 to 3 years for the average user |
| Parts that tend to break early | battery, tires, rare fender |
| Parts that can be replaced | Parts that can be replaced |
| Factors affecting lifespan | make and model, quality of components, care, and maintenance |
The lifespan of an electric scooter depends on several factors, including usage, maintenance, and battery life. Here are some steps to help determine how long an electric scooter can last:
- Check the manufacturer’s specifications to see the estimated lifespan.
- Consider the quality of the scooter – higher-quality scooters have a longer lifespan.
- Consider the frequency and duration of usage – heavy daily use may shorten the lifespan.
- Maintain the scooter properly, including regularly cleaning and inspecting it.
- Monitor the battery’s health and follow best practices for charging and storage.
What Factors Affect the Lifespan of an Electric Scooter?
| What Factors Affect the Lifespan of electric scooters | |
|---|---|
| Factors Affecting the Lifespan of Electric Scooters | Information |
| Battery type and age | The type of battery used in an electric scooter can affect its lifespan. Lead-acid batteries have a shorter lifespan of about 1-2 years compared to Lithium-ion batteries, which can last up to 3 years. The battery’s lifespan is also affected by the number of full charge cycles it undergoes. Which is usually around 300-500 cycles. |
| Charging habits | The frequency and depth of discharge during charging can also affect the battery’s lifespan. Charging the battery every day can cause it to degrade faster than charging it once a week. Similarly, discharging the battery to almost empty regularly can cause more wear and tear than using only half its capacity before recharging. It is recommended to keep the battery’s charge level between 20% and 80% to maximize its lifespan. |
| Temperature | Extreme temperatures can also affect the battery life of an electric scooter. In hot temperatures, the battery can overheat, reducing its lifespan. Similarly, in cold temperatures, the battery can lose its charge faster, reducing the range of the electric scooter. |
| Rider weight | The rider’s weight is another factor that can impact the battery life of an electric scooter. Heavier riders can put more strain on the battery and motor, reducing their lifespan. |
| Quality of components | The make and model of the electric scooter, as well as the quality of its components, can affect its lifespan. High-quality components tend to last longer and require less maintenance than low-quality ones. |
| Care and maintenance | Proper care and maintenance can also extend the lifespan of an electric scooter. Regularly checking and tightening nuts and bolts, lubricating wheels and handlebars, and replacing worn-out accessories can help keep the scooter in good condition. |
Various factors can affect the lifespan of an electric scooter. These also include:
- Quality: Electric scooters with high-quality and durable components are likely to have a longer lifespan.
- Usage: The frequency and intensity of use can also affect the scooter’s lifespan. I recommend regular and moderate usage for optimal longevity.
- Maintenance: Proper maintenance practices, such as regular cleaning, tire inflation, and lubrication, can help prolong the scooter’s lifespan.
- Battery: The lifespan of the battery is a crucial factor in determining the overall lifespan of the scooter. Quality batteries and proper charging habits can extend its life.
- Environmental conditions: Exposure to extreme temperatures, moisture, and rough terrain can affect the scooter’s lifespan. It is best to avoid these conditions to ensure the scooter lasts as long as possible.
How to Prolong the Lifespan of an Electric Scooter?
As electric scooters become increasingly popular for their convenience and eco-friendliness, it’s important to understand how to care for them to ensure their longevity. Now I will discuss ways to prolong the lifespan of your electric scooter. From proper maintenance techniques to avoid overcharging, these tips will help you get the most out of your electric scooter. We will also touch on storing your scooter in a safe place to prevent damage and extend its lifespan.
1. Proper Maintenance
Proper maintenance is crucial for maximizing the lifespan of an electric scooter. Here are some key steps to ensure its longevity:
- Clean regularly: Remove dirt and debris to prevent damage to the scooter’s components.
- Check tire pressure: Maintain optimal tire pressure for better performance and to avoid unnecessary wear and tear.
- Tighten screws and bolts: Regularly check and tighten any loose screws or bolts to prevent them from falling out or causing damage.
- Keep the battery charged: Follow the manufacturer’s guidelines for charging the battery and avoid overcharging.
- Store in a safe place: Protect the scooter from extreme temperatures, moisture, and potential theft by storing it in a secure location.
By following these maintenance steps, you can ensure that your electric scooter lasts longer and performs optimally.
2. Avoid Overcharging
Overcharging can significantly affect the lifespan of an electric scooter. To avoid this, follow these steps:
- Use the charger provided by the manufacturer and ensure it is compatible with your scooter.
- Read the scooter’s manual to determine the recommended charging time and avoid overcharging.
- Avoid leaving the scooter plugged in for extended periods after it has reached full charge.
- Unplug the charger as soon as the battery is fully charged.
- Avoid charging the scooter overnight or for longer than necessary.
3. Store in a Safe Place
Storing your electric scooter in a safe place is crucial to prolong its lifespan and prevent damage or theft. Here are some steps to consider:
- Choose a secure location: Find a space that is protected from extreme weather and potential theft.
- Invest in a cover: Use a scooter cover to shield it from dust, moisture, and UV rays.
- Avoid direct sunlight: Prolonged exposure to sunlight can cause fading or damage to the scooter’s components.
- Keep away from water: Ensure that you store your scooter in a dry area to prevent water damage.
- Secure it: Use a sturdy lock or chain to secure your scooter to a fixed object to deter theft.
What Are the Signs That an Electric Scooter Needs to Be Replaced?
As with any mode of transportation, electric scooters have a limited lifespan. However, it’s difficult to determine when it’s time to replace your electric scooter. In this section, I’ll discuss the key signs that your electric scooter may need to be replaced. I’ll cover the decrease in battery life, frequent breakdowns, and overall wear and tear on different parts of the scooter. By understanding these indicators, you can better assess when investing in a new electric scooter is time.
1. Decreased Battery Life
Experiencing a decrease in battery life with your electric scooter is a common issue, but there are steps you can take to address it:
- Regular Charging: Charge the battery regularly and avoid letting it fully deplete before recharging.
- Avoid Extreme Temperatures: Extreme heat or cold can harm battery performance, so it is best to store your scooter in a temperature-controlled environment.
- Proper Storage: If you expect not to use your scooter for an extended period, store it with a partially charged battery to prevent battery degradation.
- Check for Battery Damage: It is important to regularly inspect the battery for any signs of damage or wear and tear. Replace the battery if necessary.
- Avoid Overloading: Be mindful of the weight capacity of your scooter and avoid carrying heavy loads or exceeding it, as this can strain the battery.
2. Frequent Breakdowns
Frequent breakdowns in electric scooters can frustrate, but there are steps you can take to address and minimize them:
- Regular inspections: Check your scooter regularly for any loose or damaged parts, such as screws, wires, or connectors.
- Proper maintenance: Follow the manufacturer’s guidelines for maintenance, including cleaning, lubricating, and tightening components to prevent frequent breakdowns.
- Battery care: Ensure that you charge and store your scooter’s battery properly, avoiding extreme temperatures or overcharging to avoid frequent breakdowns.
- Safe riding: Avoid rough terrains or excessive strain on the scooter, as this can increase the risk of breakdowns.
- Timely repairs: If you notice any issues or unusual sounds, address them promptly by seeking professional help to prevent frequent breakdowns.
3. Wear and Tear on Parts
Over time, electric scooters experience wear and tear on various parts. To prolong the lifespan of an electric scooter, it is essential to take proper care of these components:
- Battery: Regularly check the performance of the battery and replace it when it degrades.
- Tires: Monitor tire pressure and replace worn-out tires to ensure proper traction.
- Brakes: Regularly inspect and adjust them to maintain safe stopping power.
- Chains or belts: Lubricate and clean these components to prevent rust and ensure smooth operation.
- Electrical components: Keep connections clean and protected from moisture to avoid malfunctioning.
By following these maintenance steps, you can extend the lifespan of your electric scooter and enjoy its benefits for a longer period.
What Are the Different Types of Electric Scooters?
In electric scooters, there are various types available on the market. Each type has its unique features and functions, making it suitable for different individuals and purposes. In this section, we’ll discuss the different types of electric scooters, including commuter, off-road, folding, and three-wheeled scooters. By understanding the differences between these types, you can determine which one best fits your needs and lifestyle. So, let’s dive in and explore the world of electric scooters.
1. Commuter Electric Scooters
Commuter electric scooters are perfect for daily transportation, providing convenience, efficiency, and eco-friendliness. To find the right one for your needs, follow these steps:
- Consider the range and speed requirements for your everyday commute.
- Look for scooters with sturdy construction and reliable brakes to ensure safety.
- Check for features like suspension, lights, and fenders for added comfort and convenience.
- Consider the weight and portability of the scooter, especially if you need to carry it on public transportation.
- Read reviews and compare prices to get the best value for your budget.
Pro-tip: Invest in a high-quality helmet and protective gear for a safe and enjoyable commuting experience.
2. Off-road Electric Scooters
They design off-road electric scooters for adventurous riders who crave the thrill of exploring off-pavement terrains. They equip these scooters with robust tires, powerful motors, and durable suspensions to conquer rough surfaces, trails, and even hills. With higher ground clearance, off-road electric scooters offer better stability and maneuverability on uneven surfaces. They also come with larger batteries for extended ride times, allowing riders to cover longer distances.
Among the popular models are the Segway Ninebot MAX, Kaabo Wolf Warrior, and Dualtron Thunder, all of which provide an exhilarating off-road riding experience for outdoor enthusiasts.
3. Folding Electric Scooters
Folding electric scooters are a convenient option for those who need a compact and portable mode of transportation. To make the most of your folding electric scooter, consider the following steps:
- Research: Look for reputable brands that offer folding electric scooters with excellent reviews and durability.
- Size and Weight: Check the dimensions and weight of the scooter when folded to ensure it meets your storage and transportation needs.
- Easy Folding Mechanism: Choose a scooter with a user-friendly folding mechanism for quick and hassle-free folding and unfolding.
- Stability: Opt for scooters with sturdy construction and a sturdy frame to ensure stability while riding.
- Range and Speed: Consider the scooter’s range and top speed to match your desired usage and distance requirements.
By following these steps, you can select a folding electric scooter that suits your needs and enjoy the convenience of portable transportation.
4. Three-wheeled Electric Scooters
Three-wheeled electric scooters offer a stable and comfortable riding experience, making them a popular choice among riders. Here are some key advantages of three-wheeled electric scooters:
- Enhanced stability: With an extra wheel, these scooters provide better balance, especially when turning or maneuvering through tight spaces.
- Comfortable seating: Many three-wheeled scooters come with a comfortable seat, providing a relaxed and enjoyable ride.
- Increased storage capacity: These scooters often have larger storage compartments, allowing riders to carry belongings or groceries.
- Easier accessibility: Three-wheeled scooters typically have a lower deck height, making it easier for riders to get on and off.
- Suitable for all ages: These scooters are ideal for riders of all ages, including older adults or individuals with limited mobility.
Read about children’s electric scooters here.
What Is the Average Cost of Replacing an Electric Scooter?
The average cost of replacing an electric scooter can vary depending on the brand, model, and specific parts that need to be replaced. Typically, the cost can range from $100 to $500 or more. Factors such as the battery, motor, tires, and other components can all contribute to the overall cost. You should also consider labor costs for repair or replacement. I recommend consulting with a reputable repair shop or contacting the manufacturer for an accurate estimate of the cost of replacing an electric scooter.
Conclusion
How Long Do Electric Scooters Last?
Electric scooters last an average of 3 to 5 years with proper maintenance. Battery life plays a crucial role in determining their longevity. Regular care, such as proper charging habits and storage, significantly impacts their lifespan. Manufacturers’ guidelines should be followed to maximize durability. Keep in mind that usage patterns and environmental factors also influence how long electric scooters will last. So, adopt good practices, adhere to guidelines, and enjoy the extended life of your electric scooter.
Frequently Asked Questions
-
How long do electric scooters last?
The lifespan of an electric scooter can vary depending on the brand, model, and usage. On average, an electric scooter can last anywhere from 3 to 5 years with proper maintenance.
-
What factors can affect the lifespan of an electric scooter?
Several factors can affect the longevity of an electric scooter, including the quality of components, frequency of use, terrain, and maintenance. It is important to follow the manufacturer’s recommendations for maintenance and avoid extreme conditions.
-
How often should I charge my electric scooter?
I recommend charging your electric scooter after each use, regardless of the distance traveled. This will help prolong the battery life and prevent it from fully draining, which can damage the battery.
-
Can I replace the battery in my electric scooter?
Most electric scooters have replaceable batteries. However, it is important to check with the manufacturer to ensure compatibility and follow proper installation instructions. Improperly changing the battery can cause damage to the scooter.
-
How do I know when my electric scooter needs maintenance?
It is important to regularly check the condition of your electric scooter, including the tires, brakes, and battery. If you notice any unusual noises or changes in performance, it may be time for maintenance. I recommend having your scooter serviced by a professional annually.
-
Are electric scooters environmentally friendly?
Electric scooters produce zero emissions and we consider them to be a more eco-friendly mode of transportation compared to gas-powered vehicles. However, the production and disposal of the batteries used in electric scooters can have environmental effects, so it is important to properly recycle and dispose of them.
Blog
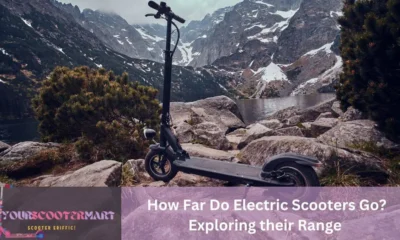
How Far Do Electric Scooters Go? Exploring their Range
Discover the answer to the burning question: “How far do electric scooters go?” My comprehensive guide covers the ins and outs of the electric scooter range.
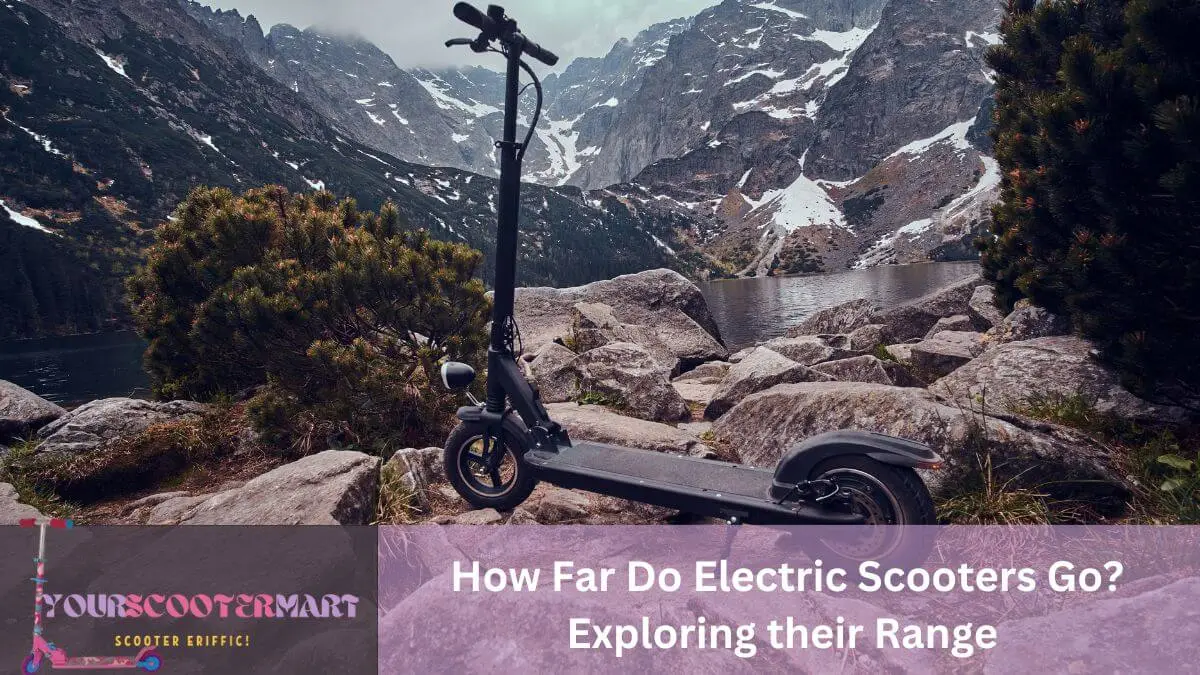
Electric scooters have become popular for transportation recently, as they are eco-friendly and cost-effective. A common question is: how far do electric scooters go on one charge? The range depends on battery capacity, motor power, rider weight, and terrain conditions.
Battery capacity matters. A 36V/10Ah battery could go 10-20 miles. Whereas, 24V/4Ah might only go 6-8 miles. Motor power also affects the range. A 250W motor has a range of 9-15 miles. While 500W gives 15-40 miles.
The rider’s weight is important too. Heavier riders consume more power, reducing the range. An example: a 250W motor can cover 20 miles with a 150 lb rider. But, 200 lbs will get less mileage.
Terrain conditions matter. Going uphill or over rough surfaces like gravel or grass uses more power and decreases the range. Riding on flat surfaces or smooth pavements helps conserve battery power and maximizes the range.

Table of Contents
To get the most out of your electric scooter’s range, consider these factors and choose the right battery capacity, motor power, and weight capacity. You can then confidently enjoy longer rides without running out of battery. Get an electric scooter today and experience the freedom it brings!
How Far Do Electric Scooters Go?
| Factor | Description | Range |
|---|---|---|
| Battery size | The larger the battery, the longer the journey. | An entry-level electric scooter usually comes with a 7.8Ah battery which will enable you to achieve a real-world range of about 20 kilometers. For those looking to travel further distances, higher-capacity 12, 13, or 15 Ah batteries can see riders enjoy double the range of an entry-level electric scooter battery. |
| User weight | A heavier rider reduces the range of an electric scooter. | The heavier the load, the more power is required to propel the scooter, which leads to less range from the battery. |
| Terrain | Hilly terrain will drain the battery quicker compared to riding on flat and even ground. | Riding uphill is significantly more challenging on an e-scooter than riding downhill. |
| Riding speed and behavior | Riding at a moderate speed and avoiding sudden acceleration and braking can help maximize the range. | Riding fast on your electric scooter is fun, but be aware, that the faster you go, the quicker you will need to recharge. |
| Temperature | Colder temperatures can reduce the battery’s performance, leading to reduced range. | Cold temperatures will reduce the battery performance. |
| Motor efficiency | A more efficient motor will use less power and allow the electric scooter to travel farther on a single charge. | The more efficient the engine, the less power it will consume, and therefore the longer the scooter can travel on a single charge. |
| Tire pressure | The tire size and type can also affect the range of electric scooters. | The electric scooter tire that lacks air may also decrease the range of the e-scooter. |
| Riding mode | Most electric scooters on the market support three riding modes (lower mode, middle mode, and faster mode). | The faster mode will decrease the range of the scooter. |
Understanding Electric Scooters
To better comprehend electric scooters, equip yourself with knowledge about what electric scooters are and how they operate. Understand the fundamentals and workings of electric scooters, and explore their capabilities and limitations in terms of distance and battery life.
What are electric scooters?
Electric scooters are an outstanding, eco-friendly way to get around urban areas. Powered by rechargeable batteries, they offer a silent, emission-free ride. They’re lightweight and compact, allowing for easy maneuvering. With safety features like LED lights, brakes, and shock absorbers, electric scooters are a great way to travel.
Before you buy one, think about the range of the battery life. Different models offer different distances. Also, check the weight limit. You’ll want it to carry your weight. Prioritize safety features like headlights, taillights, and reflectors.
When you’re using your electric scooter, remember to charge it regularly and never let the battery completely discharge. Wear a helmet for protection. And, make sure you know the local traffic laws.
By being informed, you can enjoy a convenient ride and help the environment too!
How do electric scooters work?
An electric motor powers electric scooters – no fuel required! They connect this motor to a rechargeable battery that supplies electrical energy for the scooter. When the rider speeds up, it sends electricity from the battery to the motor, turning it into mechanical energy that moves the scooter forward.
We can charge the battery by plugging it into a standard power outlet. It takes a few hours, depending on its capacity. Some scooters have regenerative braking systems. This converts the mechanical energy generated when braking into electrical energy for the battery, improving efficiency.
Electric scooters come with a control system. This lets riders adjust their speed and monitor various parameters. For example, the battery level and distance traveled. The control system usually has an LCD display or a smartphone app. This provides real-time info and a better user experience.
Pro Tip: When riding an electric scooter, wear the right safety gear such as helmets and knee pads. Safety is key!
Factors Affecting Electric Scooter Range
To optimize the range of your electric scooter, consider the factors at play: battery capacity, motor power, weight of the rider, and terrain/riding conditions. Higher battery capacity means more distance, while a powerful motor enhances speed and range. Your weight affects battery consumption, and the terrain/conditions impact energy usage.
Battery capacity
Do check out the battery capacities of electric scooters. We know which electric scooter has a greater potential to cover more ground. But, there are other factors that can affect the battery capacity. Technology advancements, improvements in lithium-ion batteries, and engineering designs optimized for energy efficiency all play a role.
In the past, electric scooters had low battery capacities. This meant they only had a limited range. Now, modern electric scooters have improved battery capacities so that riders can travel further.
Considering battery capacity is important. It directly affects the range of the scooter. So, if you want an enhanced experience, check the battery capacity.
Motor power
Let’s inspect motor power and electric scooter range. Check out the table below!
| Motor Power and Electric Scooter Range | |
|---|---|
| Motor Power (Wattage) | Average Range (miles) |
| 250 | 15 |
| 500 | 25 |
| 1000 | 40 |
| 1500 | 60 |
| 2000 | 80 |
It’s clear that more powerful motors give electric scooters greater range. A 250-watt motor is good for quick trips in towns and cities, up to 15 miles. But if you want to travel further, a 2000-watt motor can cover up to 80 miles.
Technology has improved motor performance in electric scooters. In the past, low-powered motors had limited capabilities. But now, thanks to research and development, motors deliver better performance and longer ranges.
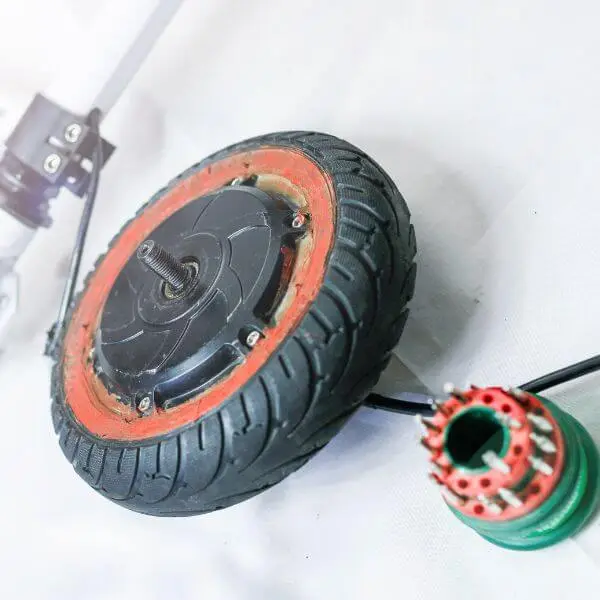
By understanding the effect of motor power on range, you can find the perfect electric scooter for your needs. Consider your intended use and required range, and you’ll be all set for efficient, enjoyable journeys.
Weight of the rider
Weight is hugely important for the electric scooter range. It affects performance and battery life.
Here’s how rider weight affects the range of an electric scooter:
| Rider Weight and the Range of an Electric Scooter | |
|---|---|
| Weight (lbs) | Average Range (miles) |
| 100-150 | 20 |
| 151-200 | 18 |
| 201-250 | 16 |
| 251-300 | 14 |
| 301 and above | 12 |
The more a rider weighs, the harder the motor must work. This uses up more energy and shortens the range of the scooter.
Fun fact! The idea of accounting for rider weight when designing electric scooters was first thought up in the early days of scooter development. Engineers discovered this would make scooters more efficient and enjoyable to use.
Terrain and riding conditions
Terrain, road conditions, off-road riding, and riding style can all affect the range of an electric scooter. Uphill rides require more energy, while downhill rides can conserve it. Smooth, well-paved roads are ideal. Off-road riding is a challenge as it needs additional power. Aggressive acceleration and braking use more battery power, whereas gradual changes help maximize the distance.
Wind speed and temperature also make a difference. Headwinds create resistance and reduce range. Windy conditions increase drag, while cold temperatures reduce battery performance.
Different models of electric scooters vary in their range of capabilities. Riding on hilly terrains can reduce range by up to 50%. Thus, it is important to understand the terrain and riding conditions to determine the expected range.
Typical Range of Electric Scooters
Now I will summarize the different distances these scooters can cover, giving you a clearer picture of the options for your desired range.
Range of entry-level electric scooters
For entry-level electric scooters, range is important. That’s the distance it can travel on a single charge. On average, it’s usually 15-20 miles. But, it can depend on the weight of the rider, speed, terrain, and even weather. Some entry-level models have smaller batteries, meaning less range.
So, riders need to plan their trips accordingly. Features like regenerative braking help recharge the battery while slowing. However, manufacturers’ claims may not always be achievable in real life.
| Range of Entry-level Electric Scooters | |
|---|---|
| Scooter Model | Average Range (miles) |
| Unagi Model One (single-motor E250) | 15.5 |
| Razor E300 Electric Scooter | 9-10 |
| Gotrax GXL V2 Commuting Electric Scooter | 12 |
| Glion Dolly Foldable Lightweight Adult Electric Scooter | 15 |
| Xiaomi Mi M365 | 18.6 |
Check out some best electric scooters for children here.
Range of mid-range electric scooters
Mid-range electric scooters are famed for their efficiency and distance. Look at the range of miles they can cover on a single charge:
| Range of Mid-range Electric Scooters | |
|---|---|
| Scooter Model | Average Range (miles) |
| Segway Ninebot ES4 | 28 |
| NIU KQi3 Pro | 31 |
| Apollo Ghost | 39 |
| Apollo Phantom | 40 |
| SPLACH Titan | 44 |
These figures may vary. Factors like terrain, rider weight, and speed influence their range.
Besides range, mid-range electric scooters offer other features. For example, some have regenerative braking systems. These help extend battery life by recovering energy.
John was a commuter. He swapped his traditional gasoline-powered scooter for an electric one. Its range surprised John. He saved money on fuel and contributed to a better environment.
Read the review of Hiboy S2 Pro electric scooter here.
Range of high-end electric scooters
High-end electric scooters offer an array of ranges to fit riders who need lengthy trips. These scooters use the most modern battery technology, allowing them to go far without needing to be recharged often.
| Range of High-end Electric Scooters | |
|---|---|
| Scooter Model | Average Range (miles) |
| Mantis King GT | 56 |
| NAMI Klima Max | 60 |
| EMOVE Cruiser S | 62 |
| Nami Burn E 2 MAX | 90 |
These scooters offer a diversity of choices based on the distance the rider wants to cover. For example, NAMI Klima Max can travel 60 miles, and Nami Burn E 2 MAX D up to 90 miles. This way, riders can select the scooter that fits their needs best.
Riders need to take into consideration the terrain, weather, and load capacity when choosing a high-end electric scooter. Thinking about these elements will help riders make a smart choice that maximizes the range and performance of their scooter.
Pro Tip: If you want to get more out of your high-end electric scooter, try riding at a consistent speed and avoiding abrupt accelerations or brakes. This way, you’ll be able to enjoy longer rides without having to recharge as often.
Tips to Maximize Electric Scooter Range
These tips will help you get the most out of your scooter’s battery life and ensure a longer and more efficient ride.
Charge the battery fully
Maximize the range of your electric scooter by charging the battery to its fullest! A fully charged battery means you can travel farther without the need to recharge. Here’s a 5-step guide to help you out:
- Connect the charger to a power outlet.
- Connect the charger to the scooter’s charging port.
- Monitor the charger’s indicator light to see progress.
- Don’t unplug or interrupt the charging process.
- Charge until the indicator shows it is full.
Take proper care of your battery too! Check for signs of damage or wear and take necessary precautions to maintain its lifespan.
I’ll share a story about how charging my battery fully changed things. Previously, I charged it partly due to lack of time. But one day I charged it overnight and was amazed at how far I could go without recharging! This saved me time and improved my productivity during my daily commute.
Charge your electric scooter’s battery to its maximum capacity to enjoy extended ranges and make your rides more enjoyable! Don’t miss out on its capabilities.
Maintain proper tire pressure
It’s essential to maintain the correct tire pressure on your electric scooter. Wrong pressure can lead to low performance, short battery life, and safety issues. Here’s what you should do:
- Check the pressure often: Use a tire pressure gauge to measure the air pressure in your scooter tires. Check once a week.
- Follow manufacturer’s guidelines: Read the user manual or contact the manufacturer to get the right tire pressure for your scooter model. Different scooters need different pressures.
- Inflate or deflate: Change the tire pressure as per the manufacturer’s advice. Under-inflated tires increase rolling resistance and consume more energy. Over-inflated tires can decrease traction and make the ride harsher.
- Invest in an air pump: Buy a good quality air pump that measures and inflates your tires accurately. Avoid gas station pumps. They’re not precise enough for smaller scooter tires.
- Monitor temperature changes: Tire pressure drops with decreasing temperatures. Adjust accordingly in colder seasons.
Tire pressure helps with range, grip, maneuverability, and safety. Invest in puncture-resistant or tubeless tires for added protection from flats and better performance.
Avoid excessive braking and acceleration
Excessive braking and acceleration negatively affect your electric scooter’s range. So, to get the most out of your ride, it’s best to minimize these actions. Here are 6 tips to help:
- Control your speed: Maintain a steady one and avoid sudden bursts.
- Anticipate traffic: monitor the road and adjust your speed accordingly.
- Gradually speed up: Don’t start too quickly. This reduces motor strain and improves energy efficiency.
- Plan your stops: Slow down in advance. This conserves energy.
- Use regenerative braking: Many scooters have it. Take advantage of it.
- Practice smooth riding techniques: Fluid movements save power.
It’s also important to regularly maintain your scooter. Check tire pressure, battery condition, and wear and tear.
A friend of mine recently had an issue with her scooter’s range. After analyzing her riding habits, it became apparent that her braking and acceleration were to blame. She followed these tips and noticed an immediate improvement in her scooter’s range and ride.
By avoiding excessive braking and acceleration and practicing smooth riding techniques, you can maximize your electric scooter’s range and make your ride smoother.
Optimize riding conditions
If you want to get the most out of your electric scooter, optimize riding conditions. Here are some tips to help you do just that:
| Ride steadily: maintain a consistent speed to save battery and cover more distance. |
| Avoid hills: going uphill drains the battery quickly, so plan your route carefully. |
| Choose even surfaces: this reduces resistance and helps the scooter glide. |
| Check tire pressure: keep tires in good condition for optimal performance. |
| Stay on top of maintenance: check for any issues like loose bolts or worn parts. |
Also, don’t forget about the weight of the rider. If you’re carrying too much stuff or if you’re very heavy, it can decrease the range of your scooter.
Studies have found that optimizing riding conditions can increase the range of an electric scooter by up to 20%. So, put these tips into practice for your electric scooter adventures!
Conclusion
Electric scooters are becoming a hit for getting around cities. But how far do electric scooters go? It depends on battery capacity, terrain, and how you ride the scooter.
Battery capacity makes a vast difference. Ones with bigger batteries can cover greater distances. Lithium-ion batteries are usually better than lead-acid ones.
Terrain is important too. Going up hills eats up power so you can’t go as far. Flat surfaces or downhill let you save energy and go further.
It also matters how you ride. Going fast uses more energy and cuts the range. Slow and steady riding, with regenerative braking, can help you get the most out of your scooter.
Sarah’s story is inspiring. She switched from public transport and her car to an electric scooter for her daily commute. She takes to and from work without running out of battery. With smart planning and efficient riding, she’s happy with her greener ride.
Frequently Asked Questions
-
How far do electric scooters go on a single charge?
Electric scooters have a range of 15 to 30 miles on a single charge, depending on the model and battery size. Factors like rider weight, terrain, and speed can also affect the scooter’s range.
-
How long does it take to recharge an electric scooter?
The charging time for electric scooters can vary depending on the battery capacity and charger type. On average, it takes about 4 to 6 hours to fully recharge an electric scooter, but some fast chargers can reduce this time to around 2 hours.
-
Can you ride electric scooters on long distances?
They designed electric scooters for short to medium-distance travel, such as commuting within a city or neighborhood. While they can cover relatively long distances, their range limitations and battery life make them less suitable for extended trips.
-
What can affect the range of an electric scooter?
Several factors can affect the range of an electric scooter, including rider weight, terrain, speed, weather, and battery age. Uphill rides, faster speeds, and heavier riders can drain the battery more quickly and reduce the scooter’s overall range.
-
Can you extend the range of an electric scooter?
There are a few ways to extend the range of an electric scooter. You can ride at slower speeds, avoid steep hills, maintain proper tire pressure, and use an energy-efficient riding style. Some scooters also offer additional battery packs or larger battery options for increased range.
-
Are there any electric scooters with longer ranges available?
Yes, there are electric scooters available for longer ranges. High-performance models or those designed for long-range commuting can offer ranges of up to 60 miles or more on a single charge. But, these scooters often come at a higher price point.

Rainy Days and Rides: Can Ninebot Scooter Get Wet?

The Need for Speed: How Fast Are the Bird Scooters?

How Long Do Electric Scooters Last? Unveiling the Secrets

How Far Do Electric Scooters Go? Exploring their Range

35 Scooter Gift Ideas | Unwrap A Fun and Thoughtful List

How Long Do Scooter Batteries Last? A Detailed Guide

The 12 Best Kick Scooters for Commuting

The Top 12 Pro Scooter Brands for 2023 (Trick Scooter Brands) Buy Now

How to Teach Your Kids to Ride a Scooter| 6 Brilliant Suggestions

Top 10 Scooter Riders in the World

4 Reasons a Scooter is the Best Present for Kids

What Electric Scooter Protective Gear Do You Always Need for Riding?
-

 Reviews1 year ago
The 12 Best Kick Scooters for Commuting
-
Reviews1 year ago
The Top 12 Pro Scooter Brands for 2023 (Trick Scooter Brands) Buy Now
-
Blog2 years ago
How to Teach Your Kids to Ride a Scooter| 6 Brilliant Suggestions
-
Blog2 years ago
Top 10 Scooter Riders in the World
-
Blog10 months ago
4 Reasons a Scooter is the Best Present for Kids
-
Blog2 years ago
What Electric Scooter Protective Gear Do You Always Need for Riding?
-
Blog10 months ago
9 Simple Kick Scooter Riding Tips For Beginners to Ride Comfortably
-
Blog2 years ago
The Complete Guide to Knowing the Parts of a Pro Scooter
-
Reviews1 year ago
The Best 3-Wheel Scooters for Kids for 2023
-
Reviews11 months ago
The 22 Best Pro Scooters at Amazon 2023
-
Reviews1 year ago
The 10 Best Pro Scooter Wheels: Which Ones are They? 2023 Reviews
-
Blog11 months ago
Scooter Size Chart – Find the Right Size for You Easily
-
Blog2 years ago
Buying Guide| How to Pick The Best Pro Scooter for 2023
-
Blog1 year ago
DIY Electric Scooter Conversion: How To Convert Kick Scooter To Electric
-
Blog2 years ago
What is the Difference between a Normal Scooter and a Stunt Scooter?
-
Blog2 years ago
The 10 Terrific Kick Scooter Exercise Benefits
-
Reviews1 year ago
The Best Fuzion Scooter: A Comparison of the Top 5 Scooters
-
Blog11 months ago
What is the Difference Between Custom and Complete Pro Scooters?
-
Reviews1 year ago
The 10 Best Scooter Bars: Enhance Your Riding Experience
-
Blog2 years ago
Pro Scooters 101: An Uncomplicated Guide
-
Blog2 years ago
8 Reasons Why a Scooter is Easier Than a Skateboard
-
Blog2 years ago
How to Ride a Pro Scooter safely |5 Important Tips
-
Reviews2 years ago
Prodigy in Motion: The Envy Prodigy S9 Pro Scooter Review
-
Blog1 year ago
How to Perform the 16 Beginner Tricks for Scooters Effortlessly
-
Blog1 year ago
How to Make Kick Scooter Faster| 12 Speed Hacks
-
Blog2 years ago
What is the Appropriate Age for a Three-Wheel Scooter?
-
Blog1 year ago
How to Brake on a Kick Scooter: Scooter Braking Techniques
-
Reviews1 year ago
The 12 Best Pro Scooter Decks for Freestyle and Street Riding for 2023
-
Blog2 years ago
What is an Electric Scooter | A Detailed Guide for Beginners
-
Blog2 years ago
How to Lock an Electric Scooter: Protect Your Investment Efficiently
-
Blog2 years ago
A Guide to Traveling with a Kick Scooter| Joyous Scootering
-
Blog1 year ago
Top 10 Best Pro Scooter Tricks for Intermediate Riders| Tricks Guide


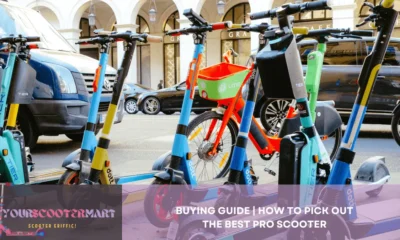


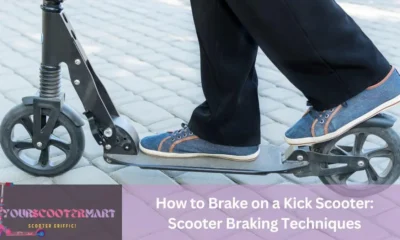


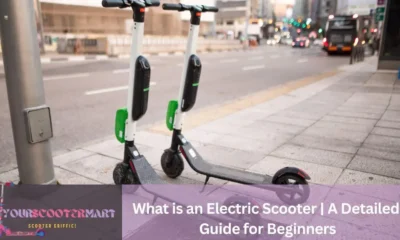


Pingback: How To Fix An Electric Scooter| 12 Ways To Repair Quickly
Pingback: How To Lock An Electric Scooter: Protect Your Investment Efficiently
Pingback: Can You Use An Electric Scooter As A Normal Scooter
Pingback: DIY Electric Scooter How To Convert Kick Scooter To Electric
Pingback: How Much Do Electric Scooters Cost? Affordable To High-End
Pingback: How To Store A Scooter: Ultimate Guide For Proper Storage
Pingback: Unlocking The Speed: How Fast Do Lime Scooters Go?