Blog
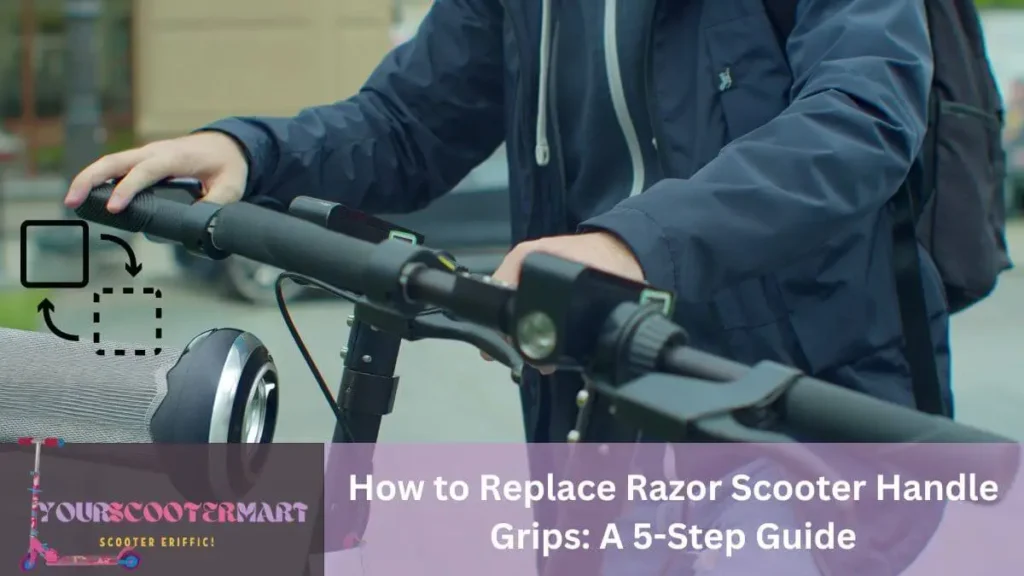
How to Replace Razor Scooter Handle Grips: A 5-Step Guide
Razor scooter handle grips can wear down over time and need to be replaced. Find out how to replace razor scooter handle grips with this easy-to-follow guide.

Razor scooter handle grips can wear down over time and must be replaced. Find out how to replace razor scooter handle grips with this easy-to-follow guide.
If you own a Razor scooter, you are aware of how enjoyable it can be to ride it around. It may, however, deteriorate over time like any other piece of machinery. Handle grips that are worn out or damaged are one of the most frequent problems that occur. Fortunately, replacing them only requires a few tools and can be done by anyone. In this guide, we will show you how to replace Razor scooter handle grips step-by-step.

An important part of the scooter’s handlebars is the handle grips. They give riders a cozy and safe grip, which enhances control and lessens hand strain. Additionally, they shield the handlebars from damage and stop rain and debris from penetrating the scooter’s interior parts.
Scooter handle grips can become worn out or broken over time, which reduces their usability and comfort. To assure the rider’s comfort and safety when this occurs, new grips must be installed.
Materials Needed
Before we get started, you’ll need to gather a few materials:
- Razor scooter
- Razor scooter handle grips
- Flathead screwdriver or grip removal tool (If needed)
- Dish soap
- Warm water
- Towel
Step-by-Step Guide for How to Replace Razor Scooter Handle Grips


Step 1: Remove the Old Handle Grips
Here is a step-by-step guide on how to remove the old handle grips from a Razor scooter:
- Turn off the power – If the Razor scooter is electric, turn off the power and disconnect the battery from preventing any accidents.
- Locate the end of the grip – The end of the grip is typically near the handlebar end cap. Locate the end of the grip and pry it off with a flat-head screwdriver or pliers.
- Cut the grip – If the grip does not come off easily, cut it off using a sharp knife or scissors. Be careful not to cut into the handlebars.
- Loosen the grip – If the grip is still difficult to remove, try spraying some soapy water or rubbing alcohol into the space between the grip and the handlebar. This will loosen the grip and make it easier to remove.
- Remove the grip – Once the grip is loose, slide it off the handlebar. If necessary, use pliers to grip and pull the grip off.
Tips for making the process easier:
- Use a grip removal tool – A grip removal tool can make the process easier and faster. It is a small, hooked tool that can be inserted under the grip to loosen it.
- Use a heat gun – If the grip is particularly stubborn, a heat gun can be used to warm up the grip and make it easier to remove.
- Work in sections – If the grip is long, work in sections to make the process more manageable. Cut the grip into smaller sections and remove them one at a time.


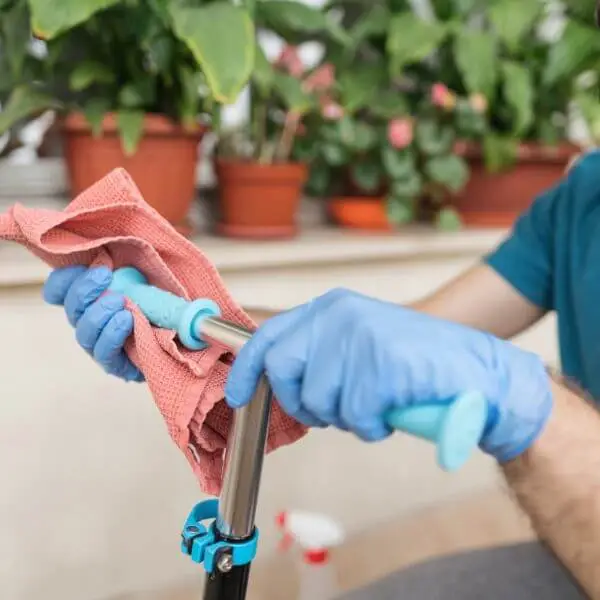
Step 2: Clean the Handlebars
After removing the old grips, it’s critical to properly clean the handlebars. Clean the handlebars with a little warm water and dish soap before wiping them down with a cloth. By doing this, the new handle grips will be properly secured.
Step 3: Install the New Handle Grips
This step will depend on the type of grip you are installing. If you are installing the lock-on style grips, you will need their clips to be clipped on both sides. Below I am writing about the steps of regular grips.
Here is a step-by-step guide on how to install new handle grips on a Razor scooter:
- Apply adhesive – Apply a small amount of grip adhesive to the inside of the new handle grip. Spread the adhesive evenly around the inside of the grip.
- Slide the grip onto the handlebar – Slide the grip onto the handlebar, making sure it is positioned properly. Push the grip on as far as possible.
- Adjust the grip – Adjust the grip as needed to ensure it is straight and in the correct position. Some grips may have a raised pattern or logo that should be positioned at the top.
- Repeat on the other side – Repeat the process on the other side of the scooter to install the second grip.
Tips for ensuring a secure installation:
- Use grip adhesive – Using a grip adhesive can help ensure the new grips stay securely in place.
- Use a hairdryer – Using a hairdryer can help to warm up the grip and make it easier to slide onto the handlebar. Or spray soapy water inside the grips and slide them on.
Step 4: Test the Grips
Once the handle grips have been set, it’s time to test them out. Take your Razor scooter for a spin around the block to ensure they’re secure and comfortable. If they feel loose or uncomfortable, adjust them until they feel right. Once the replacement process is complete, enjoy using your Razor scooter with its new handle grips.
Step 5: Maintenance
By following these recommendations for additional maintenance and care, you can help ensure your Razor scooter handle grips stay in good condition for a long time to come.
- Regularly inspect the grips – Check the new grips regularly to make sure they are still securely in place and not showing any signs of wear or tear.
- Clean the grips – Clean the grips regularly with a mix of mild soap and water to remove any dirt or grime.
- Replace the grips when necessary – If the grips become worn or damaged over time, replace them to ensure a safe and comfortable riding experience.
- Store the scooter properly – When not in use, store the scooter in a dry, protected area to prevent damage to the handle grips and other components.
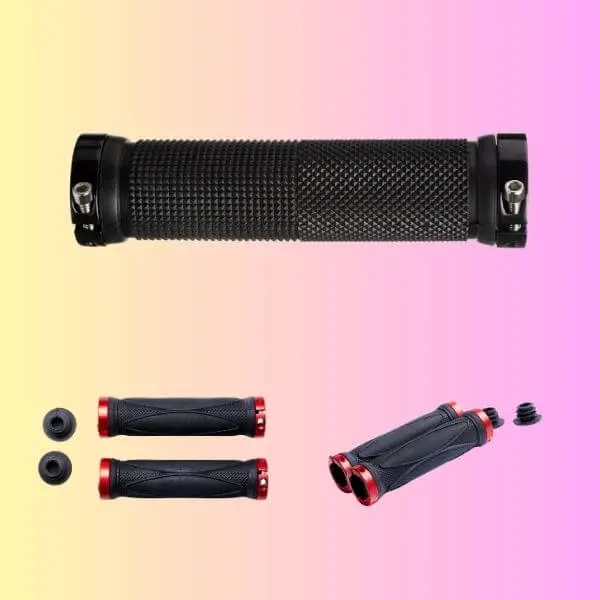
Choosing the Right Replacement Handle Grips
When selecting new handle grips for a Razor scooter, there are a few factors to consider:
- Material – Handle grips are typically made from rubber, foam, or silicone. Each material has its own advantages and disadvantages. Rubber is durable and provides a good grip, foam is lightweight and provides cushioning, and silicone is soft and comfortable.
- Size – Handle grips come in different sizes, so it’s important to select the right size for your scooter. Measure the diameter of your handlebars before purchasing new grips to ensure a proper fit.
- Design – Handle grips come in various designs and colors. Consider the design and color options available and choose the one that best fits your preferences.
- Durability – Consider the durability of the handle grips, especially if you use your scooter frequently. Look for grips made with high-quality materials that can withstand wear and tear.
Based on these factors, here are some recommendations for the best replacement options for Razor scooter handle grips:
- Razor Ultra Pro Grips – These grips are made from high-quality rubber and come in a variety of colors. They are designed to provide a comfortable grip and are durable enough to withstand frequent use.
- ODI Softies Scooter Grips – These grips are made from soft rubber and provide cushioning for a comfortable grip. They are available in various colors and designs and are easy to install.
- Envy V2 Scooter Grips – These grips are made from a soft compound material that provides a comfortable grip. They come in a variety of colors and have a simple design that is easy to install.
- Vans x Cult Waffle Grips – These grips feature the iconic Vans waffle pattern design and are made of durable rubber. They provide a good grip and are available in various colors.
The Need for New Razor Scooter Handle Grips
It is important to replace Razor scooter handle grips for several reasons:
- Comfort
Over time, the original handle grips on a Razor scooter can become worn or damaged, leading to discomfort or even pain during use. By replacing the handle grips with new, comfortable ones, you can improve your riding experience.
- Safety
If the original handle grips become too worn or damaged, they can become slippery or lose their grip, increasing the risk of accidents and injury. By replacing them with new, secure handle grips, you can help ensure a safe ride.
- Aesthetics
Over time, the original handle grips on a Razor scooter can become discolored or faded, affecting the overall appearance of the scooter. By replacing them with new, stylish handle grips, you can improve the look of your scooter.
Types of Razor Scooter Handle Grips
There are several types of handle grips available for Razor scooters. Here are some of the most common types along with their advantages and disadvantages:
- Foam Grips – Foam grips are a popular choice for Razor scooter riders due to their lightweight and comfortable design. They provide a good grip and are easy to install. However, foam grips are prone to wear and tear and may need to be replaced more frequently than other types of grips.
- Rubber Grips – Rubber grips are a durable option for Razor scooters. They provide a good grip even in wet conditions and are less likely to wear out quickly. However, rubber grips can be heavier than other types of grips, which may affect the overall weight of the scooter.
- Gel Grips – Gel grips are designed to provide extra comfort and cushioning for the rider. They are ideal for riders who experience hand fatigue or discomfort during long rides. However, gel grips can be more expensive than other types of grips and may be less durable over time.
- Bar Ends – Bar ends are accessories that can be added to the end of the handlebars to provide extra grip and protection. They are available in a range of materials, including plastic, metal, and rubber. Bar ends can help prevent the handlebars from getting damaged in the event of a fall, but they may add extra weight to the scooter.
- Custom Grips – Some Razor scooter riders prefer to customize their handle grips with their own designs or materials. This can include using leather or fabric to cover the grips or adding decals or stickers for a personalized look. Custom grips can be a fun way to personalize your scooter, but they may not provide the same level of durability or grip as standard grips.
The handle grip you select will depend on your riding style and personal preferences. When choosing a grip for your Razor scooter, take into account elements like comfort, grip, durability, and weight.
Safety precautions to take during the replacement process
You may replace the handle grips on a Razor scooter securely and successfully by following these preliminary steps and safety guidelines.
- Use Gloves – Wear gloves to protect your hands from any sharp edges or debris during the process.
- Avoid Using Excessive Force – Be gentle when removing old grips or installing new ones to avoid damaging the handlebars or other components.
- Keep Fingers Away from Sharp Edges – Be aware of sharp edges or tools and keep fingers away to prevent injury.
- Use Proper Lighting – Ensure there is enough lighting to see what you are doing and avoid accidents.
Summary of How to Replace Razor Scooter Handle Grips
Anyone can complete the simple and quick task of replacing the handle grips on a Razor scooter. You can quickly make your scooter feel like new with a few simple tools and some patience. To maintain the quality of your new grips, clean them frequently and steer clear of harsh chemicals. Enjoy your ride!