Blog
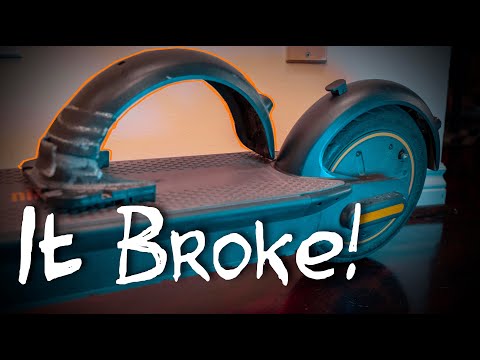
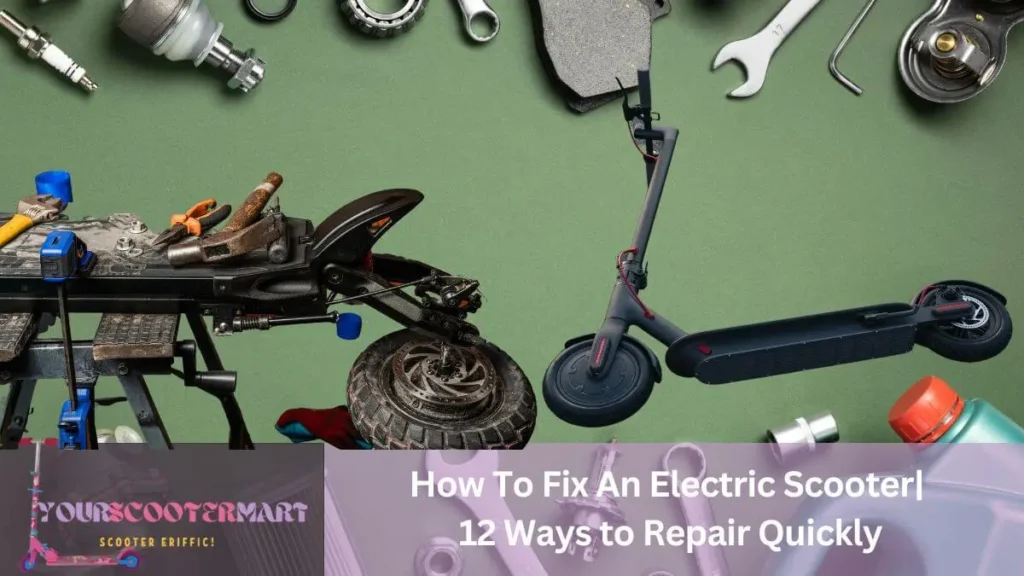
How To Fix An Electric Scooter| 12 Ways to Repair Quickly
With our detailed instructions, you can learn how to fix an electric scooter. We cover anything, from a dead battery to a malfunctioning brake. Use our simple methods to quickly get your electric scooter running again.
Are you having problems with your electric scooter? Don’t worry, we’ve got you covered. Read on and discover how to go from a breakdown to a break free in no time! Whether you’re dealing with a flat tire or an unexpected detour, we’ve got the tips and tricks you need on how to fix an electric scooter and make sure your electric scooter is up and running again in no time. Let’s get that ride running right!

Introduction
Electric scooters are becoming increasingly popular due to their maneuverability, portability, and ease of use. Electric scooters provide a convenient and affordable way for people to get around and have become a staple in many commuting routines.
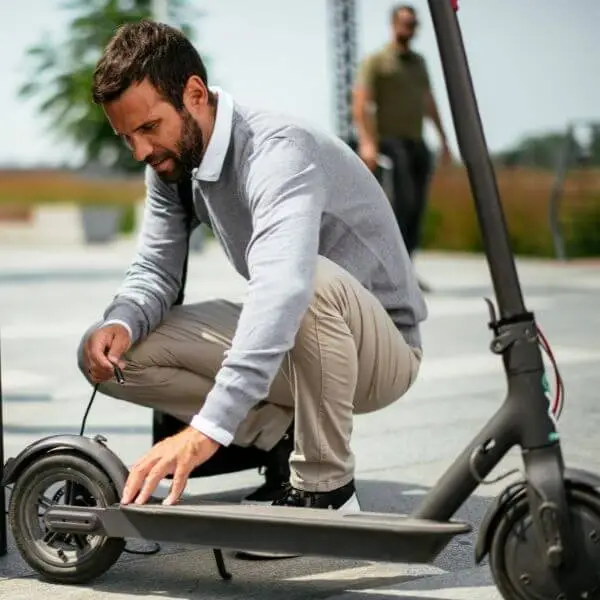
Like any other machine, an electric scooter is bound to encounter some issues from time to time. From flat tires and brakes that don’t work correctly to speed control problems, the variety of issues can vary. You won’t think why isn’t my electric scooter working. With the right knowledge, however, it is possible to fix most problems on your own. This guide will provide you with a better understanding of how to fix an electric scooter common problems and solutions that are easy enough for anyone with basic knowledge of mechanics and tools to complete.
Whether you’re troubleshooting an existing problem or performing routine maintenance, this guide aims to equip you with all the necessary information that will enable you to get your electric scooter back up and running in no time.
Safety Considerations
Safety is a priority when it comes to troubleshooting and fixing an electric scooter, so if you know how to fix an electric scooter, before proceeding with any repair work, make sure to read your vehicle’s manual and safety instructions carefully, and ride a scooter safely. Additionally, as high-voltage battery system-powered electric scooters, never attempt any work while the battery is connected — always disconnect the main power supply first.
As an extra precaution, consider wearing eye protection and rubber gloves during the entire process to minimize the risk of electrocution or injury. Additionally, take all necessary precautions to ensure that the repair area is free of debris or any other potentially hazardous materials. Finally, make sure all tools are secure and properly grounded before performing any electrical work. Check below for the ways how to fix an electric scooter.
How to Fix an Electric Scooter: Most Common Issues
Electric scooters are popular modes of transportation, but they need regular maintenance and care to stay in good working condition. Before attempting to fix or replace any parts on an electric scooter, it’s important to inspect all the components thoroughly and identify any problems or worn parts that may be causing the issue.
If a part cannot be repaired or is too worn out to continue working, it may need to be replaced. This guide will tell you in detail how to fix an electric scooter, how to inspect different parts of an electric scooter as well as how to safely and correctly replace them. Learn how to lock an electric scooter here.
Before doing any repairs, make sure your scooter is unplugged and switched off.
1. Resetting an Electric Scooter
For a few reasons, I advise that you reset your electric scooter. One reason is that by assisting in the removal of any potential software flaws or mistakes, performance and stability can be enhanced. Resetting your scooter might also assist in resolving app or other device connectivity issues. Additionally, clearing saved information, including trip history, settings, and preferences, can be helpful. Resetting your electric scooter will generally aid to guarantee peak performance and functionality.

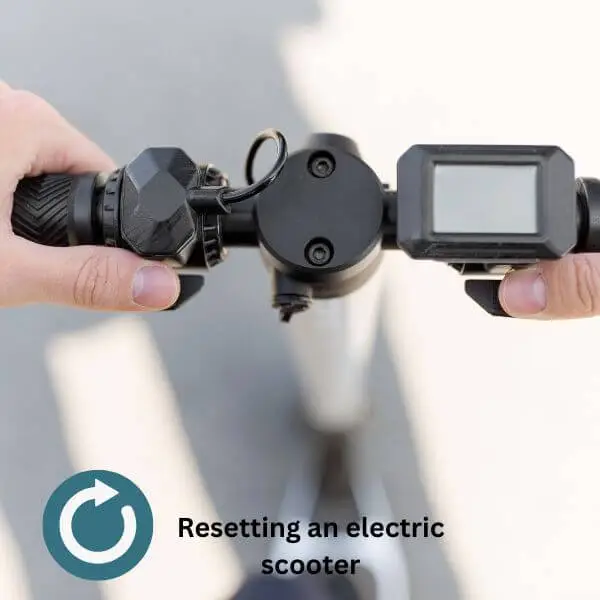
There are a few fundamental procedures you can follow to reset your electric scooter, though the procedure will vary depending on the scooter’s make and model. To reset an electric scooter, follow these general instructions:
- Find the scooter’s reset switch or button. This is usually located close to the controller or battery. For detailed instructions on where to find the reset button on your scooter, consult the owner’s manual.
- The reset is complete when you hear a beep or see a flashing light after pressing and holding the reset button or switch for a few seconds.
- Turn on your scooter after the reset is finished to check if the issue has been fixed.
- If the issue still exists after the reset, it can be a more serious one that needs additional investigation or fixes. The best course of action is to read the user guide or get in touch with the manufacturer.
Make sure you have a backup of any crucial information before resetting an electric scooter because doing so may cause some settings to be lost. Always follow the manufacturer’s directions carefully and use caution when servicing your scooter.
2. Inspect an Electric Scooter for a Kill or Arming Switch
Some electric scooters have a kill switch or arming switch, a safety device that enables you to stop or disable the motor. The location and use of the kill switch or arming switch on an electric scooter can vary depending on the scooter’s make and model, but generally, the following steps should be followed:
- Find the arming or kill switch of your scooter. This is usually located close to the controller or battery. For information on exactly where the switch is located on your scooter, consult the owner’s manual.
- Depending on the model, the switch could be a button, a toggle, or a lever.
- The motor will operate when the switch is in the “on” position. The motor will not work while the switch is in the “off” position.
- Make sure the separate key is placed correctly and turned on if your scooter comes with one.
- Refer to the instructions if you can’t find the switch or aren’t sure where it is.
It’s crucial to remember that a kill switch or arming switch can be a significant safety feature, especially while the scooter is not in use. These switches can stop unintentional starts and illegal use. Additionally, always follow the manufacturer’s directions carefully and use caution when servicing your scooter.
3. How to Fix a Scooter Battery
An electric scooter’s battery needs to be checked frequently to make sure it is operating properly. The scooter may experience power problems from a bad battery and may not be able to maintain a charge, which may reduce the scooter’s travel range.
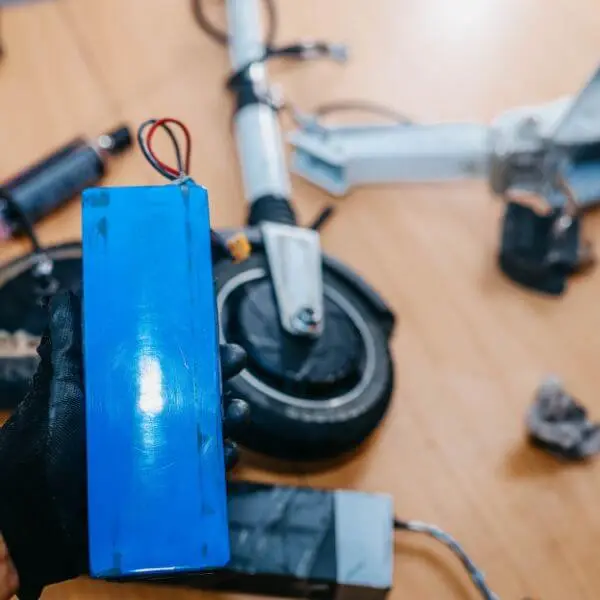
Additionally, a defective battery might reduce the scooter’s battery life or perhaps make it cease functioning completely. The scooter will always be ready to ride if the battery’s charge level and overall health are regularly monitored. This will also help the battery last longer. To reduce the potential of a fire hazard, it’s also crucial to make sure the connector is clean and the battery is secured. The below video teaches how to fix a scooter battery.
Depending on the precise problem you are having, there are several ways to fix a scooter battery, but in general, the procedure entails charging or replacing the battery. The steps to fixing a scooter battery are as follows:
- Verify the battery’s charge. If the battery is low, try charging it with the scooter’s included charger. For detailed information on how to charge your scooter’s battery, consult the manufacturer’s manual.
- It could be time to replace the battery if it won’t charge or maintain a charge.
- You’ll need to get a new battery that is compatible with the brand and model of your scooter in order to replace the old one. The manufacturer’s handbook or other resources can help you choose the right battery type and size.
- Find the battery compartment of your scooter before installing the new battery. For detailed directions on how to, consult the user guide provided by the manufacturer.
- Disconnect any cables or wires that are attached to the old battery before removing them with care.
- Put the new battery in place with caution and reattach any cables or wires that were cut from the old battery.
- To make sure everything is operating as it should, shut the battery box and take the scooter for a test drive.
It’s vital to remember that it’s always advisable to seek professional assistance if you feel uneasy or unsure about a particular fix. Additionally, always follow the manufacturer’s directions carefully and use caution when servicing your scooter.
4. Check the Fuse or Circuit Breaker on an Electric Scooter
On some electric scooters, a fuse or circuit breaker is a crucial safety component that helps shield the scooter from electrical harm brought on by power surges or short circuits. Here are several procedures for testing an electric scooter’s fuse or circuit breaker:

- Find your scooter’s fuse or circuit breaker. This is usually located close to the controller or battery. For information on the precise placement of the fuse or circuit breaker on your scooter, consult the owner’s manual.
- Depending on the scooter’s model, the fuse or circuit breaker can be a tiny, cylindrical device or a switch.
- Look for any obvious damage to the fuse or circuit breaker, such as a broken or melted fuse, or a tripped switch.
- It is necessary to replace the fuse or circuit breaker if it appears to be damaged.
- You must buy a new fuse or circuit breaker that is compatible with the make and model of your scooter in order to replace the old one. In the owner’s handbook or online, you can discover the proper fuse or circuit breaker.
- For detailed instructions on how to install the replacement fuse or circuit breaker, consult the manufacturer’s manual.
- After replacing the circuit breaker or fuse, test the scooter by turning it on to make sure everything is in working order.
It’s vital to remember that it’s always advisable to seek professional assistance if you feel uneasy or unsure about a particular fix. Additionally, always follow the manufacturer’s directions carefully and use caution when servicing your scooter.
5. Check The Wiring on The Electric Scooter
An electric scooter’s wiring needs to be examined to ensure the scooter’s correct operation and safety. Here are several procedures for inspecting an electric scooter’s wiring:
- Find every piece of wiring on your scooter. This covers the electrical connections between the battery, controller, motor, and other parts.
- Check for any obvious damage, such as exposed or frayed wires, and confirm that all connections are tight.
- If any connections are loose, check the wiring and tighten them as necessary.
- Check the wire for corrosion and, if necessary, clean the connections.
- Make sure the wire is not in contact with any moving parts or hot surfaces and look for any symptoms of overheating.
- Make sure the scooter is functioning properly by turning it on.
Additionally, it’s crucial to guarantee that the scooter is not moving when the inspection is being done.
6. Check the Speed Controller of An Electric Scooter
To make sure an electric scooter’s speed controller is working properly, it is crucial to inspect it. The scooter may experience problems with acceleration or a lack of power as a result of a broken speed controller, which could be harmful to the rider.
A defective speed controller may also shorten the scooter’s battery life and increase the risk of motor damage from overheating. The speed controller can be regularly inspected and maintained to assist guarantee the electric scooter operates safely and effectively. Here are some procedures for inspecting an electric scooter’s speed controller:
- Find the scooter’s speed controller. This is often located close to the motor or the battery. For information on where the speed controller is located on your scooter specifically, consult the owner’s manual.
- Verify the speed controller for any obvious debris or damage.
- Make sure the wiring and connections to the speed controller are secure by checking them.
- By starting the scooter, measuring its speed, and comparing it to the manufacturer’s recommendations, you can test the speed controller.
- Make sure that the scooter responds smoothly and linearly to the throttle.
- If the issue doesn’t go away, a replacement or repair of the speed controller may be necessary.
7. How to Fix Brakes on Electric Scooter
As they enable the rider to reduce speed and stop the scooter when required, properly working brakes are crucial for the rider’s safety. It may be difficult for the rider to stop the scooter if the brakes are malfunctioning, which might be risky in some circumstances. Worn or damaged brakes might also affect the scooter’s overall performance, which will make it less effective and responsive.
The brakes can assist guarantee the safe and effective operation of the electric scooter by being regularly checked and maintained. Checking the brake pads, brake cord, and brake fluid is part of this (if applicable). The following video teaches how to fix the brakes on an electric scooter.
Depending on the specific problem you are having, there are many ways to fix the brakes on an electric scooter, but generally speaking, the procedure entails inspecting and adjusting the brake cables and pads. Here are the procedures for repairing an electric scooter’s brakes:
- Locate your scooter’s brake pads. When the brake lever is lifted, these friction pads are pressed up against the wheels.
- Examine the brake pads for deterioration. The pads must be replaced if they are worn out.
- You must get new brake pads that are suitable for the brand and model of your scooter if you want to change the brake pads. Online or in the owner’s handbook, you can discover the proper brake pads.
- Remove the old brake pads and clean the brake caliper before replacing them.
- Make sure you properly positioned the new brake pads before carefully inserting them into the caliper.
- To check for fraying or damage, inspect the brake cables. Damaged cables will not function properly and will need to be replaced.
- You must get new brake cables that are suitable for the brand and model of your scooter if you want to replace the brake cables. The owner’s manual for the product or online resources can help you identify the proper brake cables.
- Remove the old brake cables and clean the cable housing before replacing them.
- To link the new brake cables to the brake lever and caliper, carefully thread them through the casing.
- Test the brakes by operating the scooter after installing the brake wires and pads to ensure they are functioning properly. We should adjust brake cables and pads as necessary.
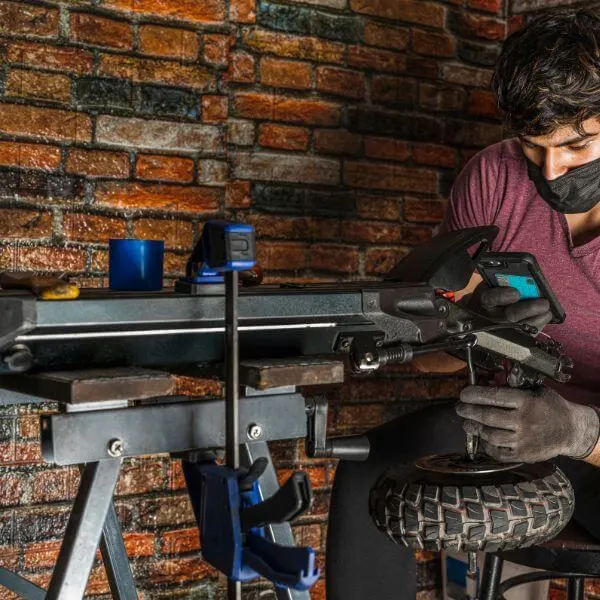
8. How to Fix an Electric Scooter Wheel
It can be risky for the user when the scooter’s stability and handling are compromised by a damaged or worn wheel. A damaged wheel can also reduce the battery life of the scooter and increase the risk of the motor overheating, both of which can result in damage.

The wheel should be regularly checked and maintained to keep the electric scooter running safely and effectively. This includes inspecting the tire and wheel rim for damage, the air pressure in the wheel, and the way the wheel is fastened to the scooter. The following video shows how to fix an electric scooter wheel.

Depending on the precise problem you are experiencing, there are many ways to fix a wheel on an electric scooter, but generally, the procedure entails removing the wheel from the scooter and either fixing or replacing it. The steps for replacing a wheel on an electric scooter are as follows:
- Find the wheel that has to be fixed. The wheel is often fastened to the scooter with a bolt or a quick-release mechanism. For detailed instructions on how to take the wheel off your scooter, consult the owner’s manual.
- Once you have taken the wheel off, look for any damage, such as a flat tire, a damaged or bent wheel, or worn-out bearings.
- If you have a flat tire, you can repair the puncture or, if necessary, change the inner tube. It will be necessary to replace the wheel if it is bent or damaged.
- You must get a replacement wheel that is compatible with the make and model of your scooter in order to replace the damaged one. The manufacturer’s handbook or other resources can help you determine the correct wheel size and style.
- You should insert the axle into the center of the new wheel before it is bolted or quick-released to the scooter to complete the installation.
- You will need to replace your worn-out wheel bearings. You might wish to seek the assistance of a professional because this is a more complicated fix.
- Give the scooter a test ride after you have replaced the wheel to make sure everything is in working order.
9. How to Fix Electric Scooter Charger
The scooter’s battery may not charge properly due to a broken charger, which may reduce the scooter’s travel range. Additionally, a bad charger may result in the battery life being reduced or even in the scooter ceasing to function.
The charger should be regularly inspected and maintained to guarantee the electric scooter is running safely and effectively. This entails examining the output voltage and current of the charger, ensuring that it is correctly plugged in and linked to the scooter, and looking for any physical damage to the charger or the scooter’s charging port.
Depending on the actual problem you are having, there are many ways to fix an electric scooter charger, but generally speaking, the procedure includes testing and perhaps replacing the charger. The steps to fixing an electric scooter charger are as follows:
- Look for any apparent damage, such as frayed wires or a broken connector, on the charger and the charging cord. The cable or charger needs to be changed if there is any damage.
- Try connecting the scooter to a different outlet to check whether the issue is with the outlet and not the charger if the charger and cable seem to be in good condition.
- Unplug the charger from the wall and try inserting it into a new outlet if the scooter still won’t charge.
- If the charger is still not functioning, there might be an issue with the scooter’s charging port. Examine the charging port for debris or damage, and if required, clean it or replace it.
- If none of the aforementioned measures has succeeded in fixing the issue, the charger itself may be the culprit. It can require replacement.
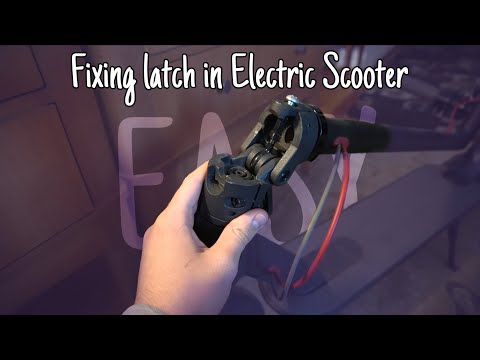
10. How to Fix Electric Scooter Handlebars
A damaged or loose handlebar, which puts the user at risk, may compromise the stability and handling of the scooter. A damaged handlebar can also make riding uncomfortable or painful.

The handlebars should be regularly inspected and maintained to keep the electric scooter operating safely and effectively. This entails tightening the handlebar, ensuring that you sealed it to the scooter, and inspecting the handlebar and steering mechanism for physical damage. This video shows how to fix the electric scooter handlebars.
Typically, the procedure entails tightening slack bolts or changing out defective components. The procedure for how to fix electric scooter handlebars is as follows:
- Make sure you firmly linked the handlebars to the stem and inspect them for any obvious damage, such as a bend or crack.
- Look for any damage or loosened fasteners on the stem. The stem joins the handlebars to the scooter’s fork and frame.
- If the bolts are loose, tighten them to the recommended torque as detailed in the owner’s manual using a wrench or Allen key.
- It will be necessary to replace the stem or handlebar clamp if they are damaged.
- You must get a new stem or handlebar clamp that is suitable for the brand and model of your scooter in order to replace the old one. The manufacturer’s handbook or other resources might help you identify the correct stem or handlebar clamp.
- Remove the old stem or handlebar clamp first, then carefully slip the new one onto the scooter’s fork and frame to complete the installation.
- Check the bolts to make sure you tightened them to the correct torque after installing the replacement stem or handlebar clamp.
- By operating the scooter, check the handlebars to see if they are functioning properly. As needed, adjust the handlebars.
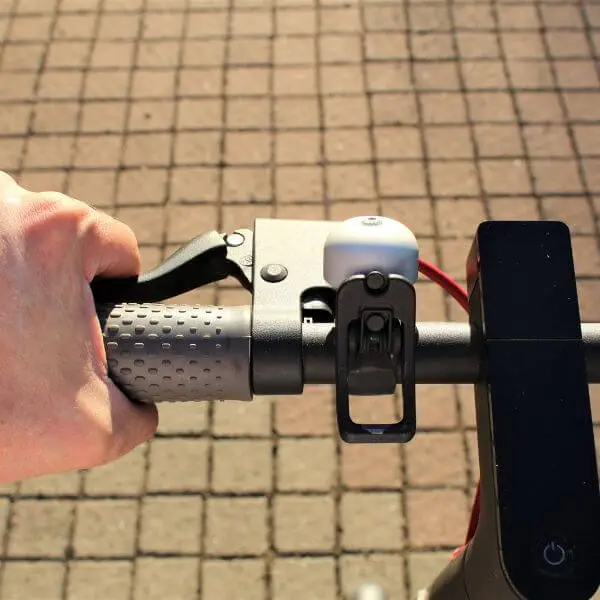
11. How to Fix Throttle on Electric Scooter
The scooter may struggle to accelerate or run low on power due to a broken throttle, which could be harmful to the rider. A defective throttle can also reduce the scooter’s battery life and increase the risk of the motor overheating, both of which can result in damage. The throttle can be regularly checked and maintained to promote the safe and effective functioning of the electric scooter.
This includes testing the throttle’s responsiveness, ensuring that you securely connected it to the controller, and inspecting the throttle for physical damage. The technique often entails inspecting the throttle cable and, if necessary, modifying or replacing it. Here are the procedures for repairing an electric scooter‘s throttle:
- To check for fraying or damage, inspect the throttle cable. The cable must be replaced if it is damaged.
- You must get a new throttle cable that is compatible with the make and model of your scooter in order to replace the damaged one. We can find suitable throttle cables online or in the owner’s handbook.
- Remove the old throttle cable and clean the cable housing before replacing it.
- Attach the new throttle cable to the controller or motor and the throttle lever by carefully threading it through the casing.
- Test the throttle after installing the new throttle cable by starting the scooter and making sure the throttle operates as intended when the lever is moved.
- Check for any loose connections between the controller, throttle lever, and motor if the scooter is still not reacting to the throttle lever.
- If the issue continues, it may be the controller or the motor, both of which require replacement or repair.
12. How to Fix Electric Scooter Motor
Your electric scooter’s motor is its heart and is what propels it forward. The scooter won’t move if the motor isn’t functioning. It’s possible that the issue is with the wiring, the controller, or the motor.
You can try a few things before calling a professional if the motor on your electric scooter isn’t working. To solve the issue, follow these steps:
- Make sure you fully charged your scooter before anything else. When in doubt, check the battery’s level and charge it.
- Make sure the wiring and connections to the motor are secure by checking them.
- Make sure the controller is connected and operating correctly by checking it.
- By directly supplying power to the motor, you may check to see if it operates. If the motor operates when power is applied directly, the controller or wiring may be the issue.
- To ensure that the throttle and brake levers are functioning properly and not causing the motor to go out, check their functionality.
- If the issue still exists, there might be an issue with the motor itself. It’s best to consult a specialist to identify and resolve the issue.
Make sure you follow any manufacturer’s specifications for tuning, oil changes, and other scheduled maintenance, and if you know how to fix an electric scooter. If anything does go wrong, be sure to act promptly to minimize any potential damage. Keep all tools and spare parts on hand so that if you do need them, they are ready to use right away.
Conclusion
Now that you have completed the necessary repairs or maintenance to get your electric scooter up and running, it’s important to keep it in good working order. Regular inspections, preventive maintenance, and prompt repairs of any issues will ensure that your electric scooter remains safe and reliable for years to come. By following these simple steps on how to fix an electric scooter, you can make sure your electric scooter always works safely and reliably whenever you turn the key.
Pingback: How To Lock An Electric Scooter: Protect Your Investment Efficiently
Pingback: How To Brake On A Kick Scooter: Scooter Braking Techniques
Pingback: How Much Do Electric Scooters Cost? Affordable To High-End